Agenda
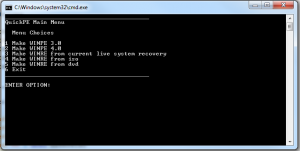
- Prepare winpe (3 or 4) with QuickPE
- Prepare the ipxe script
- Prepare the PXE server with TinyPxe Server
- Prepare the ISCSI target
- Boot to winpe, prepare the drive, and Install windows
- Reboot to your target !
Note that we have already covered installing win7 (or win8) directly to an ISCSI target : here.
However, there are times where yoy may not have a dvd drive or media available, or else, you may also want to perform some tasks before triggering the windows setup.
Prepare winpe (3 or 4) with QuickPE
You can either use MS WAIK (winpe3), or MS ADK (winpe4) or an existing windows setup DVD or ISO file.
Launch _run_me.cmd and make your choice.
Prepare the ipxe script
The following will attach an iscsi drive and will boot your winpe
#!ipxe

dhcp net0

set gateway 0.0.0.0

set keep-san 1

sanhook iscsi:192.168.1.248:tcp:3260:0:iqn.2000-01.com.synology:test

set boot-url http://${dhcp-server}

initrd ${boot-url}/images/winre.iso

kernel ${boot-url}/memdisk iso raw

boot
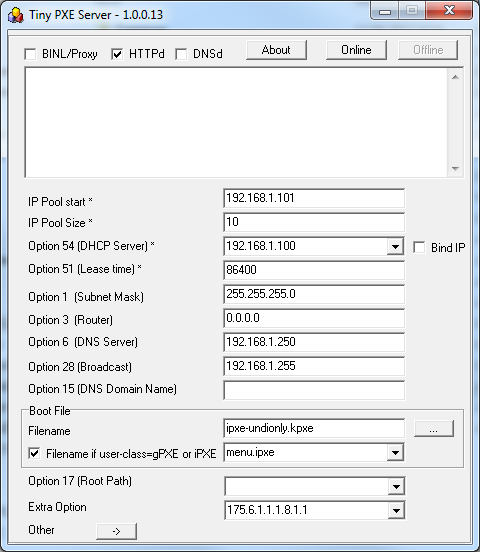
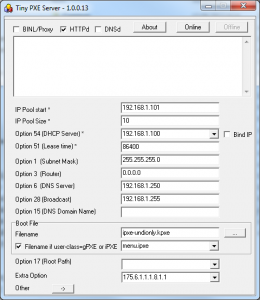
Prepare the PXE server with TinyPxe Server
Use ipxe-undionly.kpxe as « boot file name » and the above script (name it install.ipxe) as « filename if user-class=iPXE »
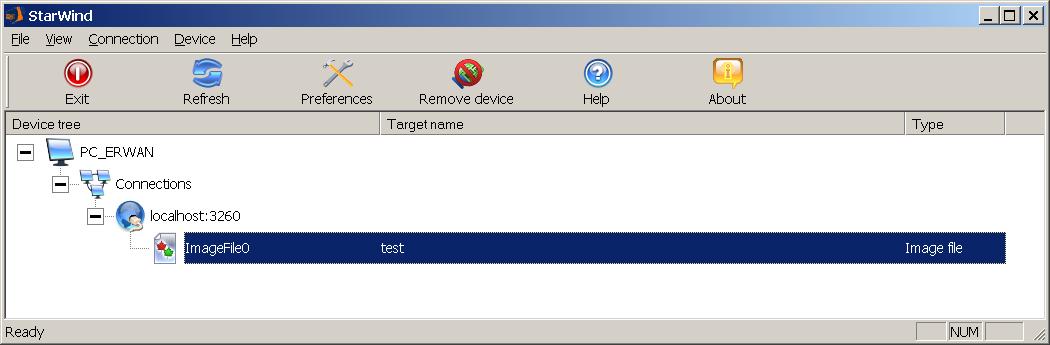
Prepare the ISCSI target
There you can either use starwind target free edition or any other target (many home nas device do have that feature also).
The target should be at least 8GB.
Boot to Winpe, prepare the drive
Now lets network boot (pxe as first device in the bios).
Computer will pxe boot, load ipxe, then load your script.
The script will atatch your iscsi target and boot into winpe.
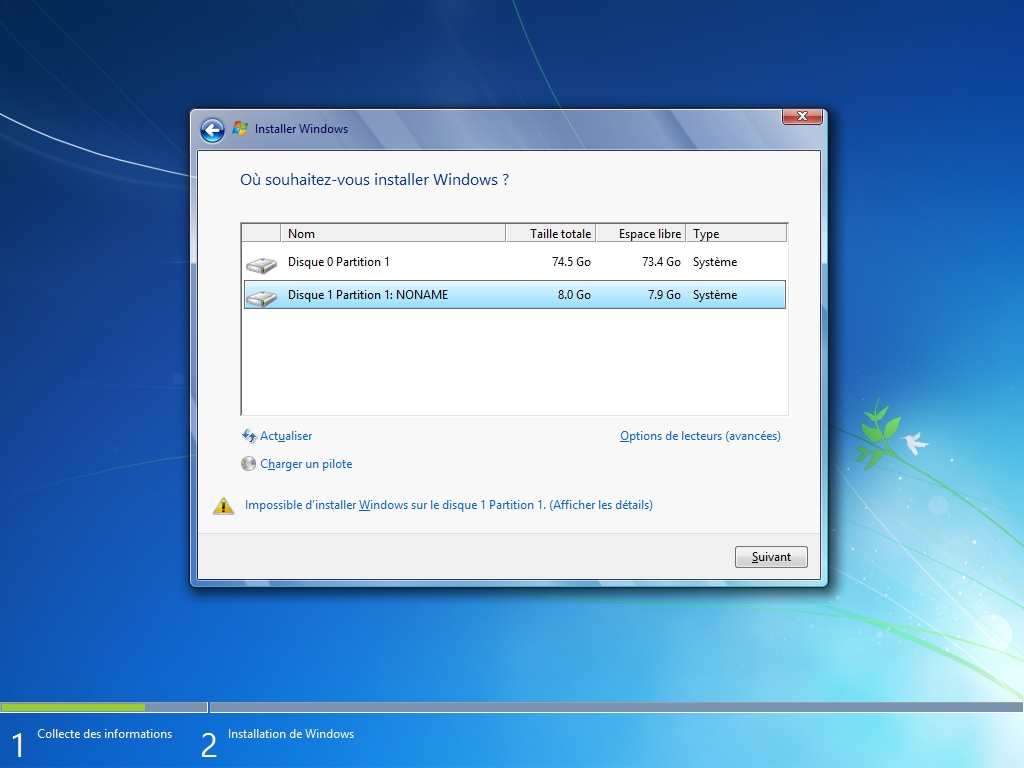
Note : you need one physical disk in your computer or else winpe might reboot in a loop. Also the windows setup will not go pass the disk selection if not physical disk is present.
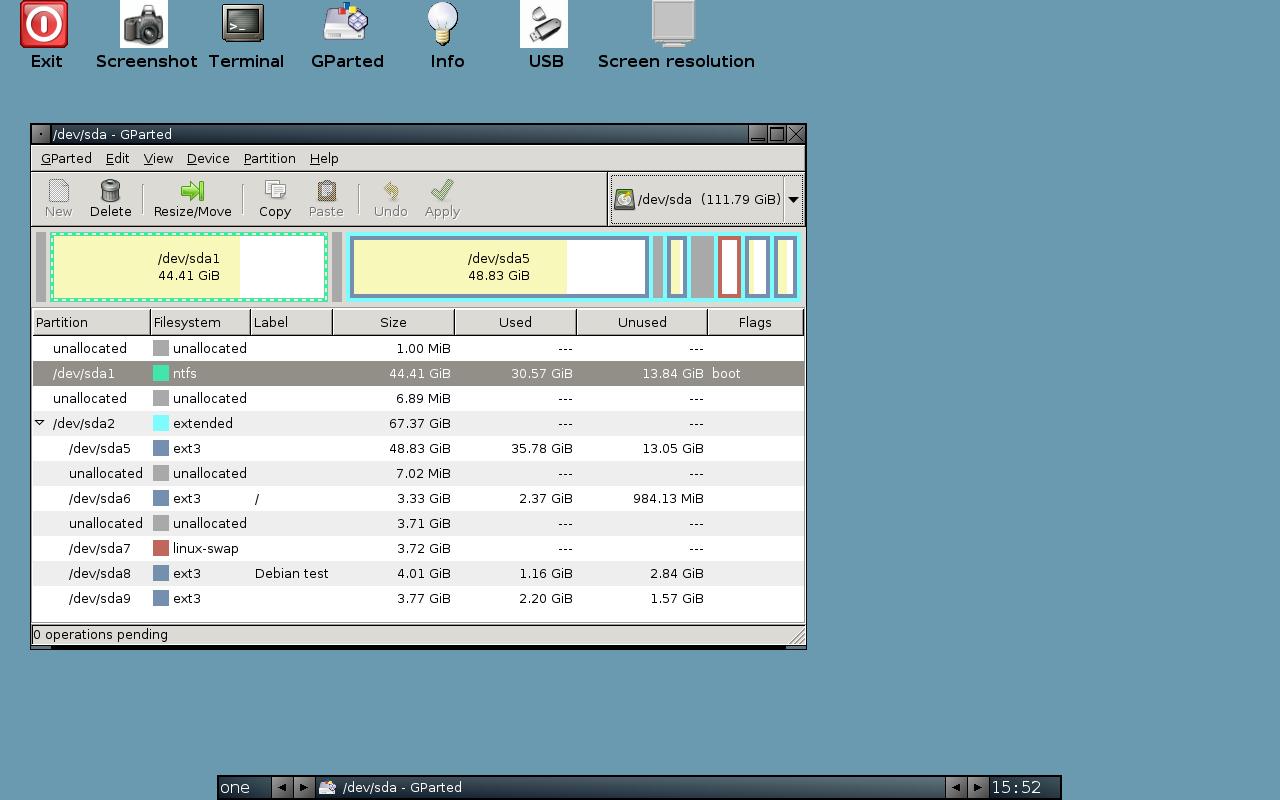
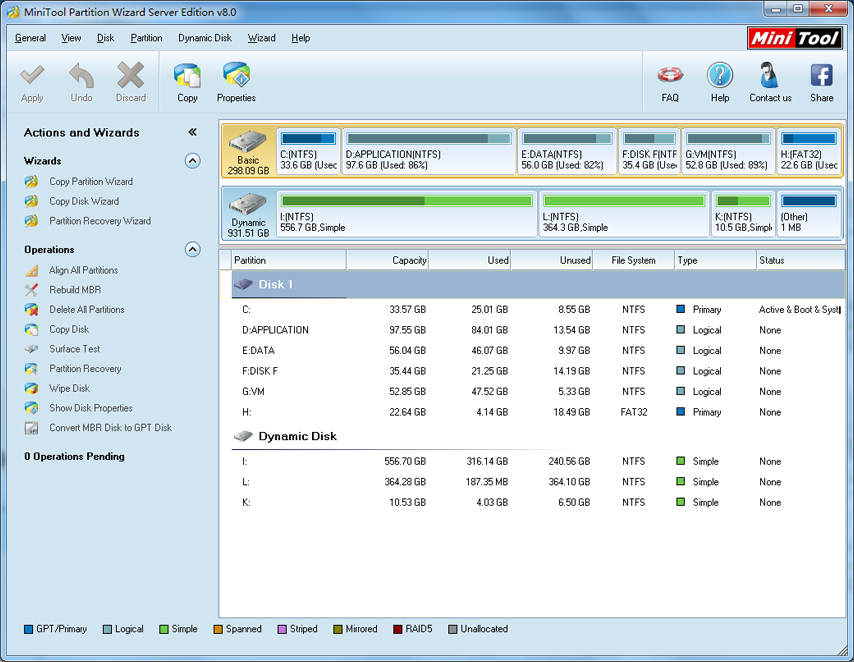
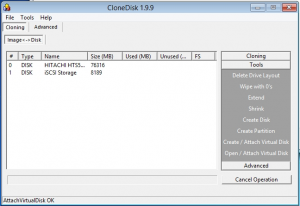
Once in Winpe you should see your iscsi target listed as a physical drive : to check this, launch CloneDisk or diskpart.
Fist, lets create a disk, then lets create a (active) partition and finally lets format it : you can do all this with CloneDisk or diskpart.
Then Lets also take care of the MBR and BS either with « bootsect.exe /nt60 c: /MBR » or with bootice or with CloneDisk.
Finally lets also create the bcd store with the following « bcdboot x:\windows /s c: ». C: is your iscsi disk, X: is your winpe disk.
Another alternative is to copy the bcd folder and the bootmgr file from your dvd to your target drive.
Then edit c:\boot\bcd with bootice or bcdedit and add a default win7 entry.
Now we are ready to perform the installation : map a drive thanks to PeNetwork (in the tinyshell launchbar) and either map a dvd shared over the network or an iso found in a network share.
Note : CloneDisk can also mount a virtual dvd driver from an iso file (only in winpe4).
Launch the windows setup and let it run : you should find your iscsi drive there.

Boot to your ISCSI target via PXE
Here comes your second ipxe script, name it boot.ipxe and use it within Tiny PXE Server :
#!ipxe

dhcp net0

set gateway 0.0.0.0

set keep-san 1

sanboot iscsi:192.168.1.248:tcp:3260:0:iqn.2000-01.com.synology:test
Windows should the complete the installation, and reboot one last to your windows desktop.