Nov 022013
 

In previous articles, we have seen what is needed to code with XNA and also the basics of an XNA class.

Lets now have a look at the small XNA app below : a bouncing ball.

-We declare some global variables
-we load our content (here : a sprite = a bleu ball) in the loadcontent xna method
-we call our updatesprite method in the update xna method which will take care of the moving position
-we draw our sprite in the draw xna method using the update spritepos

Attached to this post is the complete source code and compiled executable : xna_demo_1

Enjoy !


Imports Microsoft.Xna.Framework
Imports Microsoft.Xna.Framework.Graphics
Imports Microsoft.Xna.Framework.Input

Public Class Game
Inherits Microsoft.Xna.Framework.Game
'Fields in our game graphic manager etc'
Dim graphics As GraphicsDeviceManager
Dim spriteBatch As SpriteBatch
'
'Texture that we will render'
Private mTexture As Texture2D
'Set the coordinates to draw the sprite at'
Private spritePos As Vector2 = Vector2.Zero
'X and Y speed of the sprite'
Private XSpeed As Single = 80
Private YSpeed As Single = 120
'Vector2 used for the speed of the sprite'
Private spriteSpeed As New Vector2(XSpeed, YSpeed)

Public Sub New()
graphics = New GraphicsDeviceManager(Me)
End Sub

Protected Overrides Sub Initialize()
MyBase.Initialize()
End Sub

Protected Overrides Sub LoadContent()
MyBase.LoadContent()
' Create a new SpriteBatch, which can be used to draw textures.'
spriteBatch = New SpriteBatch(GraphicsDevice)
'
'Load the texture'
'We are using Stream , not a content (xnb format)
Dim textureStream As System.IO.Stream = New System.IO.StreamReader(Application.StartupPath + "\bille_bleu1.png").BaseStream
'Loading the texture'
mTexture = Texture2D.FromStream(GraphicsDevice, textureStream)
End Sub

Protected Overrides Sub UnloadContent()
MyBase.UnloadContent()
End Sub

Protected Overrides Sub Update(ByVal gameTime As Microsoft.Xna.Framework.GameTime)
'Allows the game to exit'
Dim newState As KeyboardState = Keyboard.GetState
If newState.IsKeyDown(Keys.Q) Then Application.Exit()
'The method that will update our sprite position'
UpdateSprite(gameTime)
MyBase.Update(gameTime)
End Sub

Protected Overrides Sub Draw(ByVal gameTime As Microsoft.Xna.Framework.GameTime)
GraphicsDevice.Clear(Color.CornflowerBlue)
'Draw the sprite'
spriteBatch.Begin(SpriteSortMode.BackToFront, BlendState.AlphaBlend)
spriteBatch.Draw(mTexture, spritePos, Color.White)
spriteBatch.End()
MyBase.Draw(gameTime)
End Sub

Private Sub UpdateSprite(ByVal gameTime As GameTime)
'The function move the sprite and check if its on the limits of the screen so it can bounce back'
Dim intMaxX As Integer
Dim intMinX As Integer = 0
Dim intMaxY As Integer
Dim intMinY As Integer = 0

'move the sprite by speed scaled by elapsed time'
spritePos += spriteSpeed * CSng(gameTime.ElapsedGameTime.TotalSeconds)
'Get the max. X and Y coordinates'
intMaxX = graphics.GraphicsDevice.Viewport.Width - mTexture.Width
intMaxY = graphics.GraphicsDevice.Viewport.Height - mTexture.Height
'Check the sprite if its at some of the edges of the screen and then reverce the speed of the sprite'
If spritePos.X > intMaxX Then
'Check if the sprite is at the maximum X coordinates of the screen if so reverse the speed'
spriteSpeed.X *= -1
spritePos.X = intMaxX

ElseIf spritePos.X < intMinX Then 'Check if the sprite is at the minimum X coordinates of the scree and reverse the speed' spriteSpeed.X *= -1 spritePos.X = intMinX End If If spritePos.Y > intMaxY Then
'Check if the sprite is at the maximum Y coordinates of the screen if so reverse the speed'
spriteSpeed.Y *= -1
spritePos.Y = intMaxY

ElseIf spritePos.Y < intMinY Then 'Check if the sprite is at the minimum Y coordinates of the scree and reverse the speed' spriteSpeed.Y *= -1 spritePos.Y = intMinY End If End Sub End Class

 Posted by at 12 h 53 min
Oct 302013
 

First of all, and this is where beginners could get confused, there is no form in an XNA VB.Net app.
You actually need a module with a main sub calling the run method of your XNA class.

You need to make a class that will inherit from Inherits Microsoft.Xna.Framework.Game and in there you will have to override a couple of methods.

The basic steps/methods are
1-initialise variables in Initialize
2-load your content (audio, fonts, textures) in loadcontent
3-put your update logic in update (check inputs, set new coordinates for a sprite, etc)
4-(re)draw your window in draw

And thats basically it, you are ready to take advantage of all the classes and methods of the XNA framework 🙂

Next article will show a working XNA app.

To make it easy on you, at the end of this article is a template project for vs2013 : copy the zip file in C:\Users\username\Documents\Visual Studio 2013\Templates\ProjectTemplates and VS2013 will propose you to create a XNA project from scratch.

See below for a skeleton class.


Imports Microsoft.Xna.Framework
Imports Microsoft.Xna.Framework.Graphics
Imports Microsoft.Xna.Framework.Audio
Imports Microsoft.Xna.Framework.Content
Imports Microsoft.Xna.Framework.Media
Imports Microsoft.Xna.Framework.Input

Public Class Game
Inherits Microsoft.Xna.Framework.Game
'Fields in our game graphic manager etc'
Dim graphics As GraphicsDeviceManager

Public Sub New()
graphics = New GraphicsDeviceManager(Me)
Window.Title = "Test"
graphics.PreferredBackBufferHeight = 300
graphics.PreferredBackBufferWidth = 300
End Sub

Protected Overrides Sub Initialize()
'TODO: Add your initialization logic here'
'...
MyBase.Initialize()
End Sub

Protected Overrides Sub LoadContent()
MyBase.LoadContent()
' TODO: use this.Content to load your game content here'
'...
End Sub

Protected Overrides Sub UnloadContent()
MyBase.UnloadContent()
'TODO: Unload any non ContentManager content here'
End Sub

Protected Overrides Sub Update(ByVal gameTime As Microsoft.Xna.Framework.GameTime)
'Allows the game to exit'
If GamePad.GetState(PlayerIndex.One).Buttons.Back = ButtonState.Pressed Then
Me.Exit()
End If
'TODO: Add your update logic here'
'...
MyBase.Update(gameTime)
End Sub

Protected Overrides Sub Draw(ByVal gameTime As Microsoft.Xna.Framework.GameTime)
GraphicsDevice.Clear(Color.CornflowerBlue)
'TODO: Add your drawing code here'
'...
MyBase.Draw(gameTime)
End Sub
End Class

VS2013 template

xna0

 Posted by at 21 h 36 min
Oct 302013
 

I am usually not a pc gaming person nor I am into vb.net langage (thus I used to teach it years ago).
Still, lately I could see my 2 kids writing games in VB.net.
And of course, as « Daddy » is a dev guy, he sure knows how to handle scrolling, sprites, pixel collision, etc.

Well it happens not (at all!) 🙂

Hence me looking closer at this platform, reading some nice things around XNA (a framework for dotnet) and deciding to give it a go.

I will therefore post in the coming days a serie of article illustrating some very basics that should beginners to start writing some tiny games.

First things first, you will need :
Visual Studio Express 2013 windows desktop edition (free)
the XNA assemblies (Game Studio 4)
Dotnet 4.x (will be installed with VS2013)
XNA runtime (needed also when youo distribute your executable).

Note that XNA is end of life (MS will drop support on April 2014).
However this is a good framework to practice and learn gaming tips and tricks.
Plus, there is a future is MonoGame : an open source implementation of the Microsoft XNA 4.x Framework .

Regards,
Erwan

Oct 162013
 

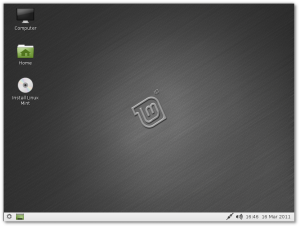
Here below a step by step to PXE boot Linux Mint over NFS

needed :
ipxe
tiny pxe server
winnfsd
Mint

1/Prepare the Linux Mint files

open mint.iso in winrar (or any other iso reading capable tool).
extract casper folder to x:\pxe\iso\mint (or any path that suit you)

2/Prepare NFS Server

launch winnfsd with the following :
winnfsd.exe -id 0 0 x:\pxe\iso\mint

note : adapt the above path with your own path

3/Prepare iPXE Script

#!ipxe
set nfs-server ${next-server}
kernel /ISO/mint/casper/vmlinuz root=/dev/nfs boot=casper netboot=nfs nfsroot=${nfs-server}:/x/ISO/mint quiet splash
initrd /ISO/mint/casper/initrd.lz
boot

note : adapt /x/pxe/ISO/mint to your own path.
name it mint.ipxe and put it in x:\pxe

4/Prepare PXE Server

put ipxe-undionly.kpxe in x:\pxe
launch tiny pxe server with the following settings (leave other settings untouched) :
->boot filename = ipxe-undionly.kpxe (use the browse files and folders « … » button)
->filename if user-class=iPXE = mint.ipxe

push the online button

5/Boot !

pxe boot your computer and here we go 🙂

linux-mint-10-lxde

 Posted by at 19 h 25 min
Oct 132013
 

Olof Lagerkvist, the well known author of the popular ImDisk has released an open source virtual SCSI driver.

With that driver, you can mount a virtual disk which will be seen as physical disk by windows.
This vritual disk will appear as a disk in your devices but also in your disk management console.
Read more here.

Being quite enthusiast about this driver, I have decided to come up with a GUI named ImgMount, read more here.

mount

 Posted by at 12 h 43 min
Sep 282013
 

A person (which I believe is the author of another similar product, thus that other product is nagware and /or payware versus Tiny PXE Server being fully freeware) has been truly harrassing / spamming me over the last days claiming the ownership (if not copyright) around the kernel parameters I used for Ubuntu Live booting (cifs, nfs, etc) in previous articles.

I will recommend this page if you wish to understand more about which kernel parameter does what.

I consider syntax around products like grub4dos, syslinux, ipxe, distros kernels to be public knowledge and therefore free for everyone to copy paste, modify, re use.
Actually there are tons of forums and web sites out there experimenting and sharing findings and knowledge about this.
Some of my favorite forums being http://reboot.pro or iPxe.

Any dev guy claiming copyright over this syntax would (IMHO) look like a fool.

I will not approve comments over my blog around this topic.
Why? Because I can.

I purposedly will not mention or quote that guy harassing me simply.
Why? Because I do not want to encourage such behaviors and because that person does not deserved to be mentionned.

Topic closed…

 Posted by at 13 h 53 min
Sep 252013
 

We already saw earlier how to boot ubuntu over ipxe with NFS

Howeber, setting an NFS server in windows is not always a given.

Hence, lets see now how to do it with a CIFS share i.e a simple windows share which Tiny PXE Server can manage for you.
Side note :
-I could make it work only with ubuntu 12.10, not 13.04.
-I could make it work only in plain DHCP mode, not proxydhcp mode.

needed :
ipxe
tiny pxe server
ubuntu

1/ open ubuntu.iso in winrar

(or any other iso reading capable tool)

extract casper folder to x:\pxe\iso\ubuntu.12.10 (or any path that suit you)


2/use the below ipxe script :

#!ipxe
set boot-url http://${dhcp-server}
kernel ${boot-url}/ubuntu.12.10/casper/vmlinuz showmounts toram root=/dev/cifs boot=casper netboot=cifs nfsroot=${cifs-server}/pxe/ubuntu.12.10 NFSOPTS=-ouser=username,pass=password,ro ip=dhcp ro
initrd ${boot-url}/ubuntu.12.10/casper/initrd.lz
boot

In the script above, adapt the username and password.
name it ubuntu.ipxe and put it in x:\pxe

Note :
About that syntax, as there is a controversy, be aware that I did not make it up.
Google it and you’ll find tons of similar examples and/or variants.
See my latest post abou this here.


3/put ipxe-undionly.kpxe in x:\pxe


4/modify config.ini with the following

(so that Tiny PXE Server will create a PXE share automatically for you pointing to your root folder) :
[dhcp]
smb=1


5/launch tiny pxe server with the following settings

(leave other settings untouched) :
tick « httpd »
boot filename = ipxe-undionly.kpxe (use the browse files and folders « … » button)
tick « filename if user-class=gPXE or iPXE » = http://${dhcp-server}/ubuntu.ipxe
push the online button


6/pxe boot your computer and here we go

7/ Notes

The same can be achieved with LinuxMint.

Extract the content of the iso to mint folder and use the ipxe script below :

#!ipxe
set boot-url http://${dhcp-server}
kernel ${boot-url}/mint/casper/vmlinuz showmounts toram root=/dev/cifs boot=casper netboot=cifs nfsroot=${cifs-server}/pxe/mint NFSOPTS=-ouser=username,pass=password,ro ip=dhcp ro
initrd ${boot-url}/mint/casper/initrd.lz
boot

 Posted by at 12 h 47 min
Sep 242013
 

needed :
tiny pxe server
gParted

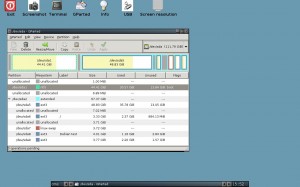
open gparted.iso in winrar (or any other iso reading capable tool).
extract live folder to x:\pxe\iso\gparted

use the below ipxe script :

#!ipxe
set boot-url http://${dhcp-server}
kernel ${boot-url}/ISO/gparted/vmlinuz boot=live config union=aufs noswap noprompt vga=788 fetch=${boot-url}/ISO/gparted/filesystem.squashfs
initrd ${boot-url}/ISO/gparted/initrd.img
boot

name it gparted.ipxe and put it in x:\pxe

put ipxe-undionly.kpxe in x:\pxe

launch tiny pxe server with the following settings (leave other settings untouched) :
tick « httpd »
boot filename = ipxe-undionly.kpxe (use the browse files and folders « … » button)
tick « filename if user-class=gPXE or iPXE » = http://${dhcp-server}/gparted.ipxe
push the online button

pxe boot your computer and here we go


Gparted

 Posted by at 18 h 51 min
Sep 222013
 

In  a previous article, we have seen how to use RF433 chips with Arduino.

Pros for these chips are they are cheap and easy to use, cons is that they provide little or no tuning.

Hence, lets play a bit now with 2 texas cc1101 : with this component, we can play with the frequency (from 315 to 915), the modulation (ask, fsk, etc) and tons of other parameters.

You can use smartRF (optional) to dive into parameters.

First lets start with the pins of the cc1101.

spi

Here how it will connect to the arduino uno board (see here for other boards) :

cc1101_2_bb

To use the CC1101, you will need the panstamp library here.

Note that it will also work with the elechouse library here.

The initial thread on the Arduino forum.

Now lets have a look at the sketches.

Sending

#include "EEPROM.h"
#include "cc1101.h"

CC1101 cc1101;

// The LED is wired to the Arduino Output 4 (physical panStamp pin 19)
#define LEDOUTPUT 7

// counter to get increment in each loop
byte counter;
byte b;
//byte syncWord = 199;
byte syncWord[2] = {199, 0};

void blinker(){
digitalWrite(LEDOUTPUT, HIGH);
delay(100);
digitalWrite(LEDOUTPUT, LOW);
delay(100);
}

void setup()
{
Serial.begin(38400);
Serial.println("start");

// setup the blinker output
pinMode(LEDOUTPUT, OUTPUT);
digitalWrite(LEDOUTPUT, LOW);

// blink once to signal the setup
blinker();

// reset the counter
counter=0;
Serial.println("initializing...");
// initialize the RF Chip
cc1101.init();

//cc1101.setSyncWord(&syncWord, false);
cc1101.setSyncWord(syncWord, false);
cc1101.setCarrierFreq(CFREQ_433);
cc1101.disableAddressCheck();
//cc1101.setTxPowerAmp(PA_LowPower);

delay(1000);

Serial.print("CC1101_PARTNUM "); //cc1101=0
Serial.println(cc1101.readReg(CC1101_PARTNUM, CC1101_STATUS_REGISTER));
Serial.print("CC1101_VERSION "); //cc1101=4
Serial.println(cc1101.readReg(CC1101_VERSION, CC1101_STATUS_REGISTER));
Serial.print("CC1101_MARCSTATE ");
Serial.println(cc1101.readReg(CC1101_MARCSTATE, CC1101_STATUS_REGISTER) & 0x1f);

Serial.println("device initialized");
//Serial.println("done");
}

void send_data() {
CCPACKET data;
data.length=10;
byte blinkCount=counter++;
data.data[0]=5;
data.data[1]=blinkCount;data.data[2]=0;
data.data[3]=1;data.data[4]=0;
//cc1101.flushTxFifo ();
Serial.print("CC1101_MARCSTATE ");
Serial.println(cc1101.readReg(CC1101_MARCSTATE, CC1101_STATUS_REGISTER) & 0x1f);
if(cc1101.sendData(data)){
Serial.print(blinkCount,HEX);
Serial.println(" sent ok :)");
blinker();
}else{
Serial.println("sent failed :(");
blinker();
blinker();
}
}

void loop()
{
send_data();
delay(4000);
}

Receiving

#include "EEPROM.h"
#include "cc1101.h"

// The LED is wired to the Arduino Output 4 (physical panStamp pin 19)
#define LEDOUTPUT 4

// The connection to the hardware chip CC1101 the RF Chip
CC1101 cc1101;

byte b;
byte i;
byte syncWord = 199;
long counter=0;
byte chan=0;

// a flag that a wireless packet has been received
boolean packetAvailable = false;

void blinker(){
digitalWrite(LEDOUTPUT, HIGH);
delay(100);
digitalWrite(LEDOUTPUT, LOW);
delay(100);
}

/* Handle interrupt from CC1101 (INT0) gdo0 on pin2 */
void cc1101signalsInterrupt(void){
// set the flag that a package is available
packetAvailable = true;
}

void setup()
{
Serial.begin(38400);
Serial.println("start");

// setup the blinker output
pinMode(LEDOUTPUT, OUTPUT);
digitalWrite(LEDOUTPUT, LOW);

// blink once to signal the setup
blinker();
// initialize the RF Chip
cc1101.init();

cc1101.setSyncWord(&syncWord, false);
cc1101.setCarrierFreq(CFREQ_433);
cc1101.disableAddressCheck(); //if not specified, will only display "packet received"
//cc1101.setTxPowerAmp(PA_LowPower);

Serial.print("CC1101_PARTNUM "); //cc1101=0
Serial.println(cc1101.readReg(CC1101_PARTNUM, CC1101_STATUS_REGISTER));
Serial.print("CC1101_VERSION "); //cc1101=4
Serial.println(cc1101.readReg(CC1101_VERSION, CC1101_STATUS_REGISTER));
Serial.print("CC1101_MARCSTATE ");
Serial.println(cc1101.readReg(CC1101_MARCSTATE, CC1101_STATUS_REGISTER) & 0x1f);

attachInterrupt(0, cc1101signalsInterrupt, FALLING);

Serial.println("device initialized");
}

void ReadLQI()
{
byte lqi=0;
byte value=0;
lqi=(cc1101.readReg(CC1101_LQI, CC1101_STATUS_REGISTER));
value = 0x3F - (lqi & 0x3F);
Serial.print("CC1101_LQI ");
Serial.println(value);
}

void ReadRSSI()
{
byte rssi=0;
byte value=0;

rssi=(cc1101.readReg(CC1101_RSSI, CC1101_STATUS_REGISTER));

if (rssi >= 128)
{
value = 255 - rssi;
value /= 2;
value += 74;
}
else
{
value = rssi/2;
value += 74;
}
Serial.print("CC1101_RSSI ");
Serial.println(value);
}

void loop()
{
if(packetAvailable){
Serial.println("packet received");
// Disable wireless reception interrupt
detachInterrupt(0);

ReadRSSI();
ReadLQI();
// clear the flag
packetAvailable = false;

CCPACKET packet;

if(cc1101.receiveData(&packet) > 0){
if(!packet.crc_ok) {
Serial.println("crc not ok");
}

if(packet.length > 0){
Serial.print("packet: len ");
Serial.print(packet.length);
Serial.print(" data: ");
for(int j=0; j<packet.length; j++){
serial.print(packet.data[j],hex);
serial.print(" ");
}
serial.println(".");

 }
}
 // Enable wireless reception interrupt attachInterrupt(0, cc1101signalsInterrupt, FALLING);
}
}
Voila :)
You know should not a bit better on the cc1101 pins, on how to connect it to the arduino and you have basic code to developp your projects.
 Posted by at 18 h 14 min