Looking for support around PXE boot? have requests around Tiny PXE Server?
Check it out here
Looking for support around PXE boot? have requests around Tiny PXE Server?
Check it out here
We already saw earlier how to boot ubuntu over ipxe with NFS
Howeber, setting an NFS server in windows is not always a given.
Hence, lets see now how to do it with a CIFS share i.e a simple windows share which Tiny PXE Server can manage for you.
Side note :
-I could make it work only with ubuntu 12.10, not 13.04.
-I could make it work only in plain DHCP mode, not proxydhcp mode.
needed :
–ipxe
–tiny pxe server
–ubuntu
(or any other iso reading capable tool)
extract casper folder to x:\pxe\iso\ubuntu.12.10 (or any path that suit you)
#!ipxe
set boot-url http://${dhcp-server}
kernel ${boot-url}/ubuntu.12.10/casper/vmlinuz showmounts toram root=/dev/cifs boot=casper netboot=cifs nfsroot=${cifs-server}/pxe/ubuntu.12.10 NFSOPTS=-ouser=username,pass=password,ro ip=dhcp ro
initrd ${boot-url}/ubuntu.12.10/casper/initrd.lz
boot
In the script above, adapt the username and password.
name it ubuntu.ipxe and put it in x:\pxe
Note :
About that syntax, as there is a controversy, be aware that I did not make it up.
Google it and you’ll find tons of similar examples and/or variants.
See my latest post abou this here.
(so that Tiny PXE Server will create a PXE share automatically for you pointing to your root folder) :
[dhcp]
smb=1
(leave other settings untouched) :
tick « httpd »
boot filename = ipxe-undionly.kpxe (use the browse files and folders « … » button)
tick « filename if user-class=gPXE or iPXE » = http://${dhcp-server}/ubuntu.ipxe
push the online button
7/ Notes
The same can be achieved with LinuxMint.
Extract the content of the iso to mint folder and use the ipxe script below :
#!ipxe
set boot-url http://${dhcp-server}
kernel ${boot-url}/mint/casper/vmlinuz showmounts toram root=/dev/cifs boot=casper netboot=cifs nfsroot=${cifs-server}/pxe/mint NFSOPTS=-ouser=username,pass=password,ro ip=dhcp ro
initrd ${boot-url}/mint/casper/initrd.lz
boot
needed :
–tiny pxe server
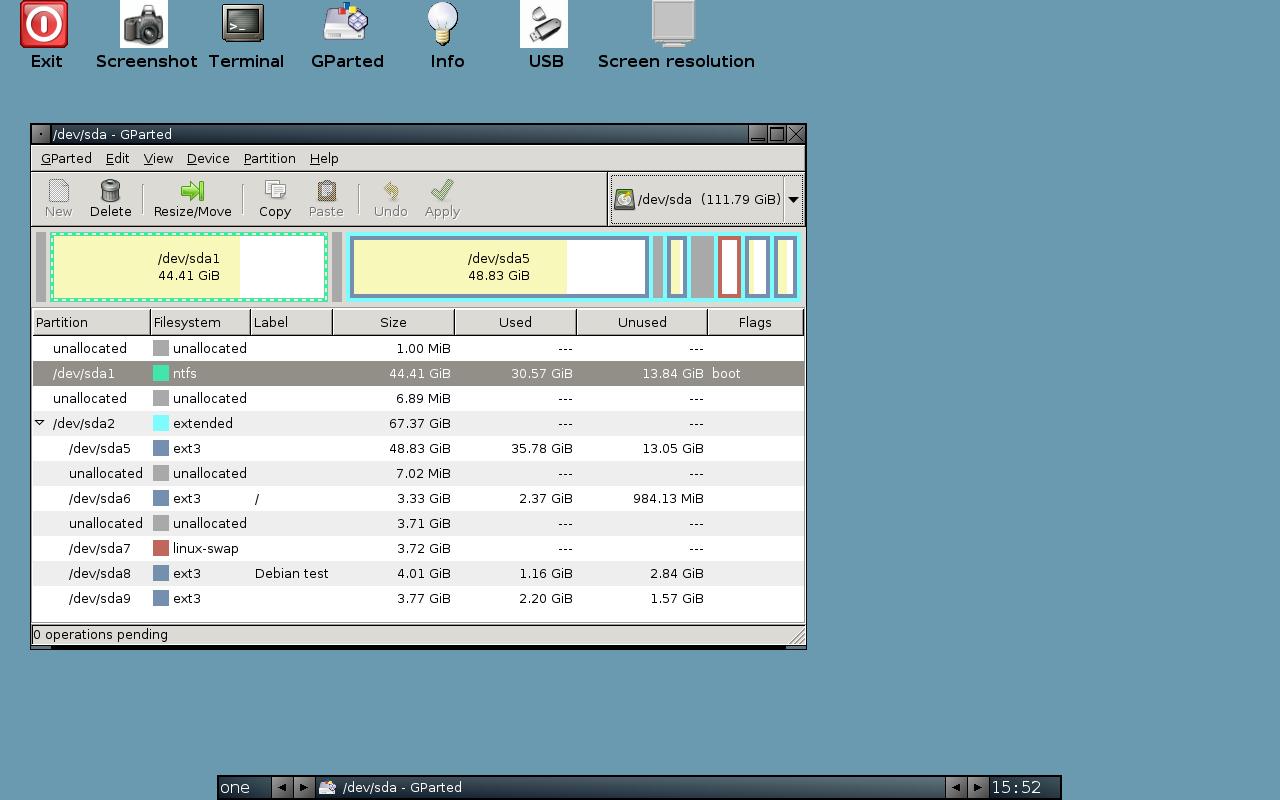
–gParted
open gparted.iso in winrar (or any other iso reading capable tool).
extract live folder to x:\pxe\iso\gparted
use the below ipxe script :
#!ipxe

set boot-url http://${dhcp-server}

kernel ${boot-url}/ISO/gparted/vmlinuz boot=live config union=aufs noswap noprompt vga=788 fetch=${boot-url}/ISO/gparted/filesystem.squashfs

initrd ${boot-url}/ISO/gparted/initrd.img

boot
name it gparted.ipxe and put it in x:\pxe
put ipxe-undionly.kpxe in x:\pxe
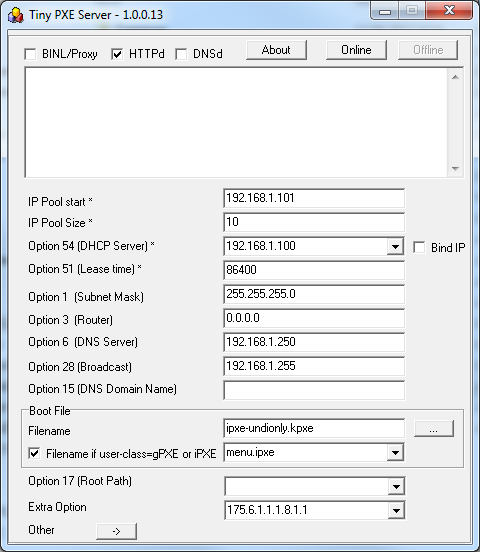
launch tiny pxe server with the following settings (leave other settings untouched) :
tick « httpd »
boot filename = ipxe-undionly.kpxe (use the browse files and folders « … » button)
tick « filename if user-class=gPXE or iPXE » = http://${dhcp-server}/gparted.ipxe
push the online button
pxe boot your computer and here we go
Native shell is a program for experiments with a Native API mode of Windows. Native mode is a mode, where chkdsk starts at the boot time before login screen appears. It is used by chkdsk utility to check and correct errors in the system partition. The Native mode itself is a blue screen (it is blue in Windows XP, another color in other versions of Windows), which appears before the Windows login screen. See the image (click the picture to zoom it):
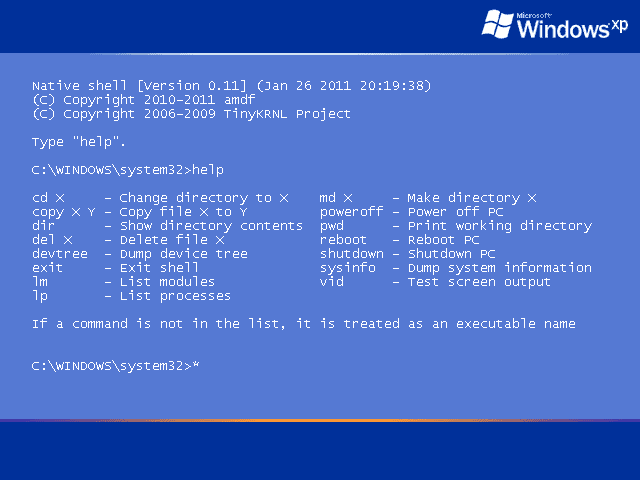
The program is a shell (a command line interface). It can perform some basic operations with Windows files and directories. Program runs before starting of main Windows components, so we have access to the entire file system and registry without many restrictions. All operations are implemented through the Native API (ntdll.dll).
Generate your ipxe images (iso, lkrn, usb, kpxe, pxe, …) here
Lots of useful example to build an ipxe menu :
–http://boot.salstar.sk/
–https://gist.github.com/robinsmidsrod/2234639
needed :
–ipxe
–tiny pxe server
–winnfsd
–ubuntu
1/open ubuntu.iso in winrar or 7zip (or any other iso reading capable tool).
extract casper folder to x:\pxe\iso\ubuntu.13.04 (or any path that suit you)
2/launch winnfsd with the following :
winnfsd.exe -id 0 0 x:\pxe\iso\ubuntu.13.04
note : adapt the above path with your own path
3/use the below ipxe script :
#!ipxe
set boot-url http://${dhcp-server}
kernel ${boot-url}/ISO/ubuntu.13.04/casper/vmlinuz root=/dev/nfs boot=casper netboot=nfs nfsroot=${dhcp-server}:/x/ISO/ubuntu.13.04 ip=dhcp ro
initrd ${boot-url}/ISO/ubuntu.13.04/casper/initrd.lz
boot
note : adapt /x/pxe/ISO/ubuntu.13.04 to your own path.
name it ubuntu.ipxe and put it in x:\pxe
4/put ipxe-undionly.kpxe in x:\pxe
5/launch tiny pxe server with the following settings (leave other settings untouched) :
tick « httpd »
boot filename = ipxe-undionly.kpxe (use the browse files and folders « … » button)
tick « filename if user-class=gPXE or iPXE » = http://${dhcp-server}/ubuntu.ipxe
push the online button
6/pxe boot your computer and here we go
Latest version 1.0.0.14 now support ProxyDHCP features.
In short :
TinyPXE Server can now co exist « peacefully » with another dhcp server on the same LAN.
No more race conditions where first one (dhcp server) to answer wins the lease.
With ProxyDHCP option enable, TinyPXE Server will now « only » provide the boot file name information (and only to proxydhcp clients) : the client will then use/combine the dhcp offers from both servers (lease+boot file name).
Tested with success with the following boot straps : ipxe , gpxe , pxelinux , startrom.0 , pxeboot.com …
Discuss it here at reboot.pro.
More info around PXE here.
Cheers,
Erwan

Agenda
Note that we have already covered installing win7 (or win8) directly to an ISCSI target : here.
However, there are times where yoy may not have a dvd drive or media available, or else, you may also want to perform some tasks before triggering the windows setup.
Prepare winpe (3 or 4) with QuickPE
You can either use MS WAIK (winpe3), or MS ADK (winpe4) or an existing windows setup DVD or ISO file.
Launch _run_me.cmd and make your choice.

Prepare the ipxe script
The following will attach an iscsi drive and will boot your winpe
#!ipxe

dhcp net0

set gateway 0.0.0.0

set keep-san 1

sanhook iscsi:192.168.1.248:tcp:3260:0:iqn.2000-01.com.synology:test

set boot-url http://${dhcp-server}

initrd ${boot-url}/images/winre.iso

kernel ${boot-url}/memdisk iso raw

boot
Prepare the PXE server with TinyPxe Server
Use ipxe-undionly.kpxe as « boot file name » and the above script (name it install.ipxe) as « filename if user-class=iPXE »
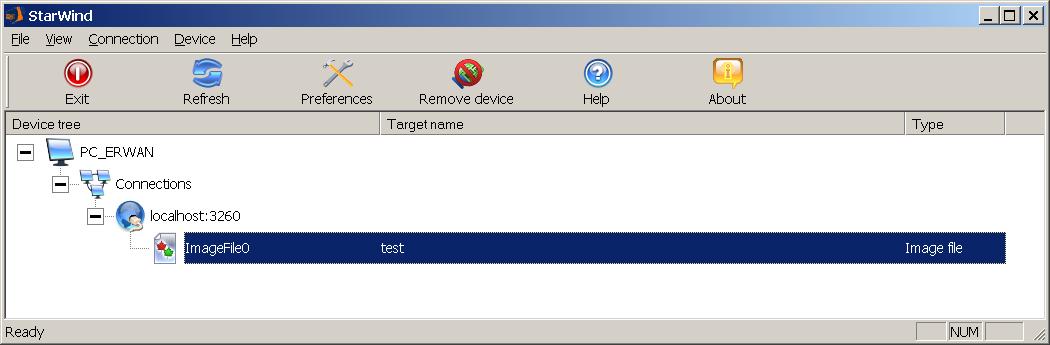
Prepare the ISCSI target
There you can either use starwind target free edition or any other target (many home nas device do have that feature also).
The target should be at least 8GB.
Boot to Winpe, prepare the drive
Now lets network boot (pxe as first device in the bios).
Computer will pxe boot, load ipxe, then load your script.
The script will atatch your iscsi target and boot into winpe.
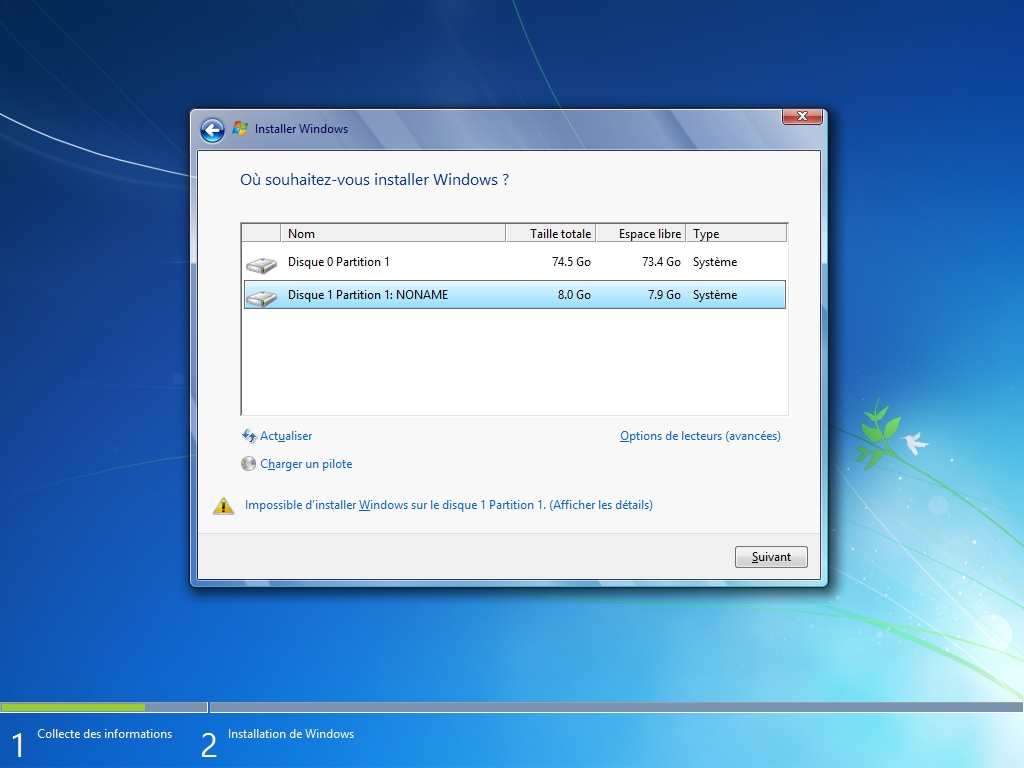
Note : you need one physical disk in your computer or else winpe might reboot in a loop. Also the windows setup will not go pass the disk selection if not physical disk is present.
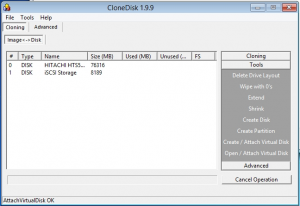
Once in Winpe you should see your iscsi target listed as a physical drive : to check this, launch CloneDisk or diskpart.
Fist, lets create a disk, then lets create a (active) partition and finally lets format it : you can do all this with CloneDisk or diskpart.
Then Lets also take care of the MBR and BS either with « bootsect.exe /nt60 c: /MBR » or with bootice or with CloneDisk.
Finally lets also create the bcd store with the following « bcdboot x:\windows /s c: ». C: is your iscsi disk, X: is your winpe disk.
Another alternative is to copy the bcd folder and the bootmgr file from your dvd to your target drive.
Then edit c:\boot\bcd with bootice or bcdedit and add a default win7 entry.
Now we are ready to perform the installation : map a drive thanks to PeNetwork (in the tinyshell launchbar) and either map a dvd shared over the network or an iso found in a network share.
Note : CloneDisk can also mount a virtual dvd driver from an iso file (only in winpe4).
Launch the windows setup and let it run : you should find your iscsi drive there.
Boot to your ISCSI target via PXE
Here comes your second ipxe script, name it boot.ipxe and use it within Tiny PXE Server :
#!ipxe

dhcp net0

set gateway 0.0.0.0

set keep-san 1

sanboot iscsi:192.168.1.248:tcp:3260:0:iqn.2000-01.com.synology:test
Windows should the complete the installation, and reboot one last to your windows desktop.