Install Windows 7 / 2008 (and up) directly to ISCSI with gPXE
Steps:
1.The bios Setup
2.The bootstrap loader
3.The ISCSI Target
4.Booting step 1
5.Booting step 2
6.Installing Windows
7.Completing the installation
1.The bios Setup
Configure bios in that order : network,cdrom,disk (or floppy, cdrom, disk if you go for the floppy bootstrap loader option).
Note :
-With vmware virtual server, you need to load your vmxnet driver in order to see your iscsi target.
-It is recommended to load also you vm scsi drivers.
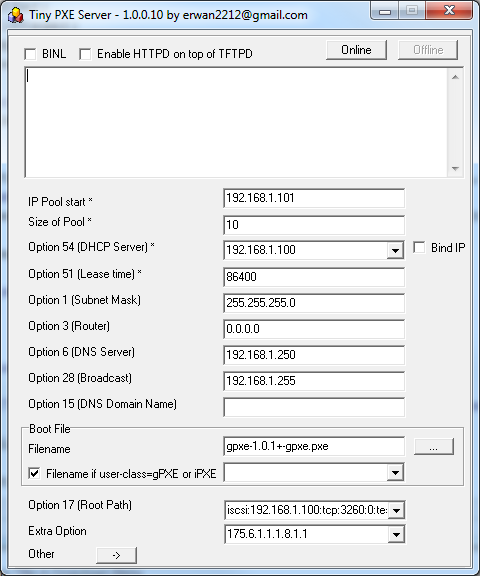
2.The bootstrap loader
Setup a dhcp/pxe server with gpxe bootstrap loader and keep-san vendor option and root path set to iscsi.
(See note at the end of this bullet to go without a dhcp/tftp server)
->root path in my case was iscsi:192.168.1.100:tcp:3260:0:test.
->vendor option is 175.6.1.1.1.8.1.1 (etherboot length 6 code 1 length 1 value 1 code 8 length 1 value 1).
(more details here http://www.etherboot.org/wiki/dhcpd
->Here I use Tiny PXE Server under windows which supports the specific vendor and root-path options.
See discussion about this tool here.
ps : there is a bug with ms iscsi initiator and the gateway (see here http://reboot.pro/15965/) -> it is recommended not to fill in the router field as done in the picture above
*********** Note *******************************************
As an option, you can skip the dhcp/tftp server by using a boot disk (floppy or cdrom) made by gpxe.
See below.
Go to http://rom-o-matic.net/gpxe/gpxe-git/gpxe.git/contrib/rom-o-matic ,
choose floppy image as output format / choose « all-drivers » as NIC Type / tick time_cmd and digest_cmd, and use the following embedded script :
#!gpxe
echo « Greetings! Hit Ctrl-C to bail out. »
sleep 5
echo « Going to DHCP on primary network adapter »
ifopen net0
dhcp net0
clear net0.dhcp/gateway:ipv4
set keep-san 1
echo « you may replace ${dhcp-server} by an hardcoded IP »
echo « you may replace windows by a specific target name »
sanboot iscsi:${dhcp-server}::::windows
boot
Use this boot disk on your physical computer or in your virtual image.
To make it easy on you, here are the image : floppy usb iso.
********** end of note ************************************************
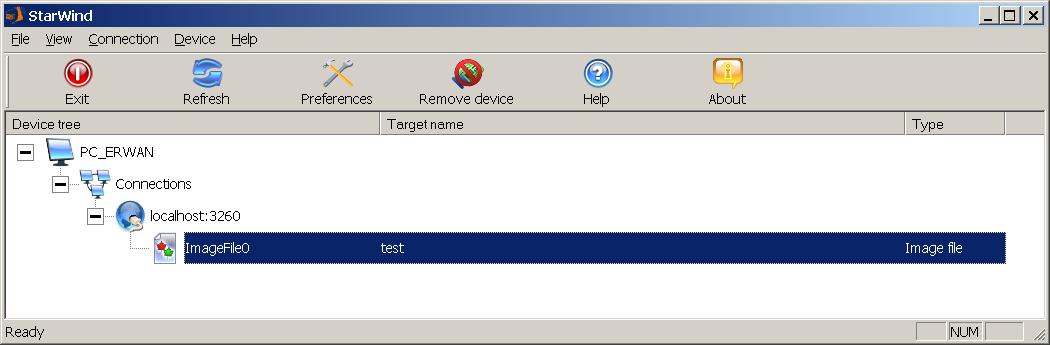
3.The ISCSI Target
Setup an iscsi target with a blank image file (filled with zero).
->I use StarWind from RocketDivision.
4.Booting step 1
Launch computer : it will boot on network, load gpxe which in turn will try to boot on san (as defined in root path)
5.Booting step 2
Sanboot will fail to boot on the image file (since it is a blank one)
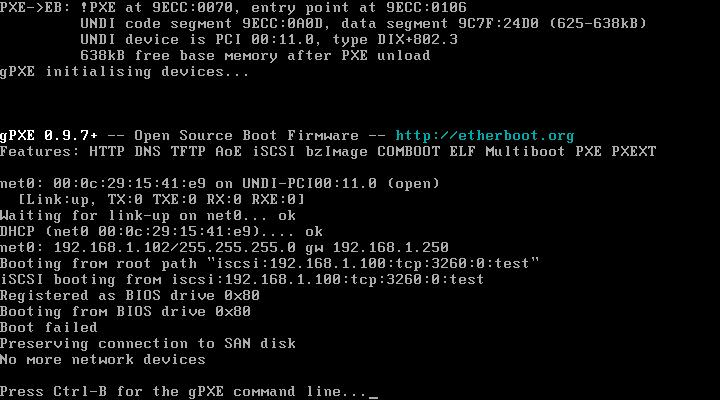
->gPXE/sanboot will then exit and computer will continue with boot from cdrom (as defined in bios)
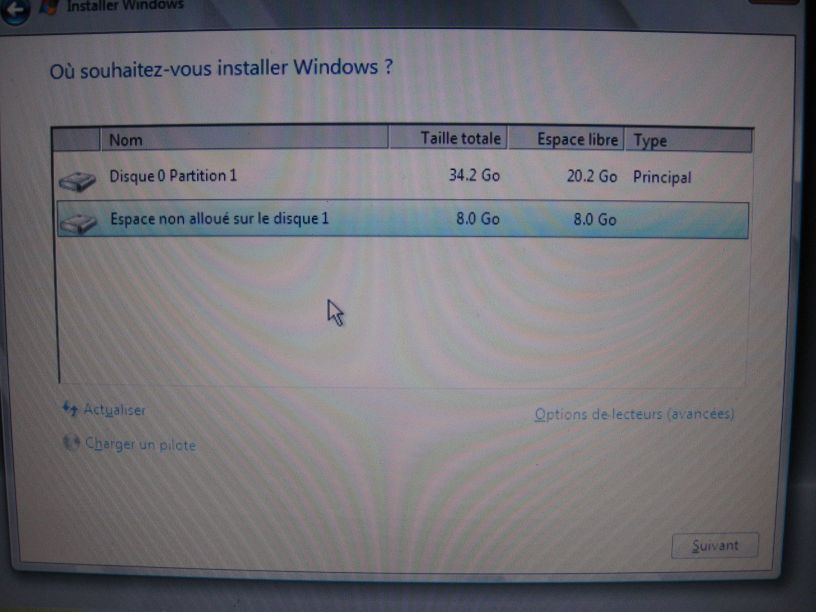
6.Installing Windows
Windows 2008 setup should now see the iscsi target as a local disk (since we use the keep-san gPXE option).
If not, shift+f10 to go and command prompt and check your network with ipconfig /all .
7.Completing the installation
Next reboot will the computer boot directly on the iscsi target.
Gpxe page on w2k8 iscsi install : http://www.etherboot.org/wiki/sanboot/win2k8_iscsi_install
[…] Here […]
[…] Note that we have already covered installing win7 (or win8) directly to an ISCSI target : here. […]