Mai 212014
 

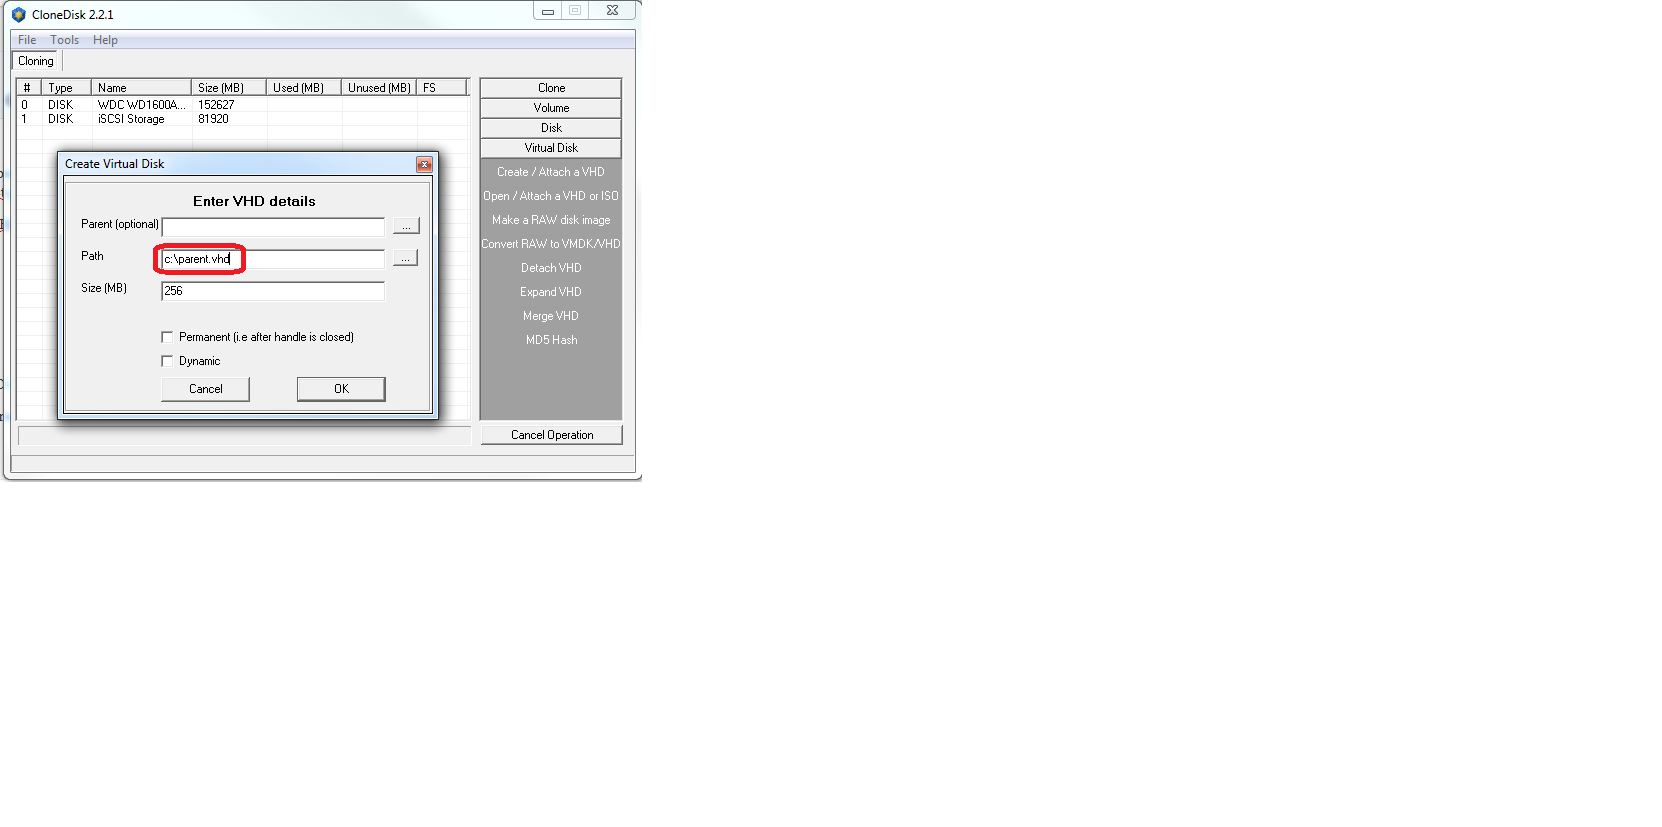
You built this perfect VHD and you decide to call it parent.

Now life needs to go on and changes need to be introduced to your disk but you want to be able to revert back to your parent if needed.
Or else, at some point you decide that changes introduced since your last parent needs to be merged in your master.

In order to achieve the above (revert or merge) we will create a second VHD called child.

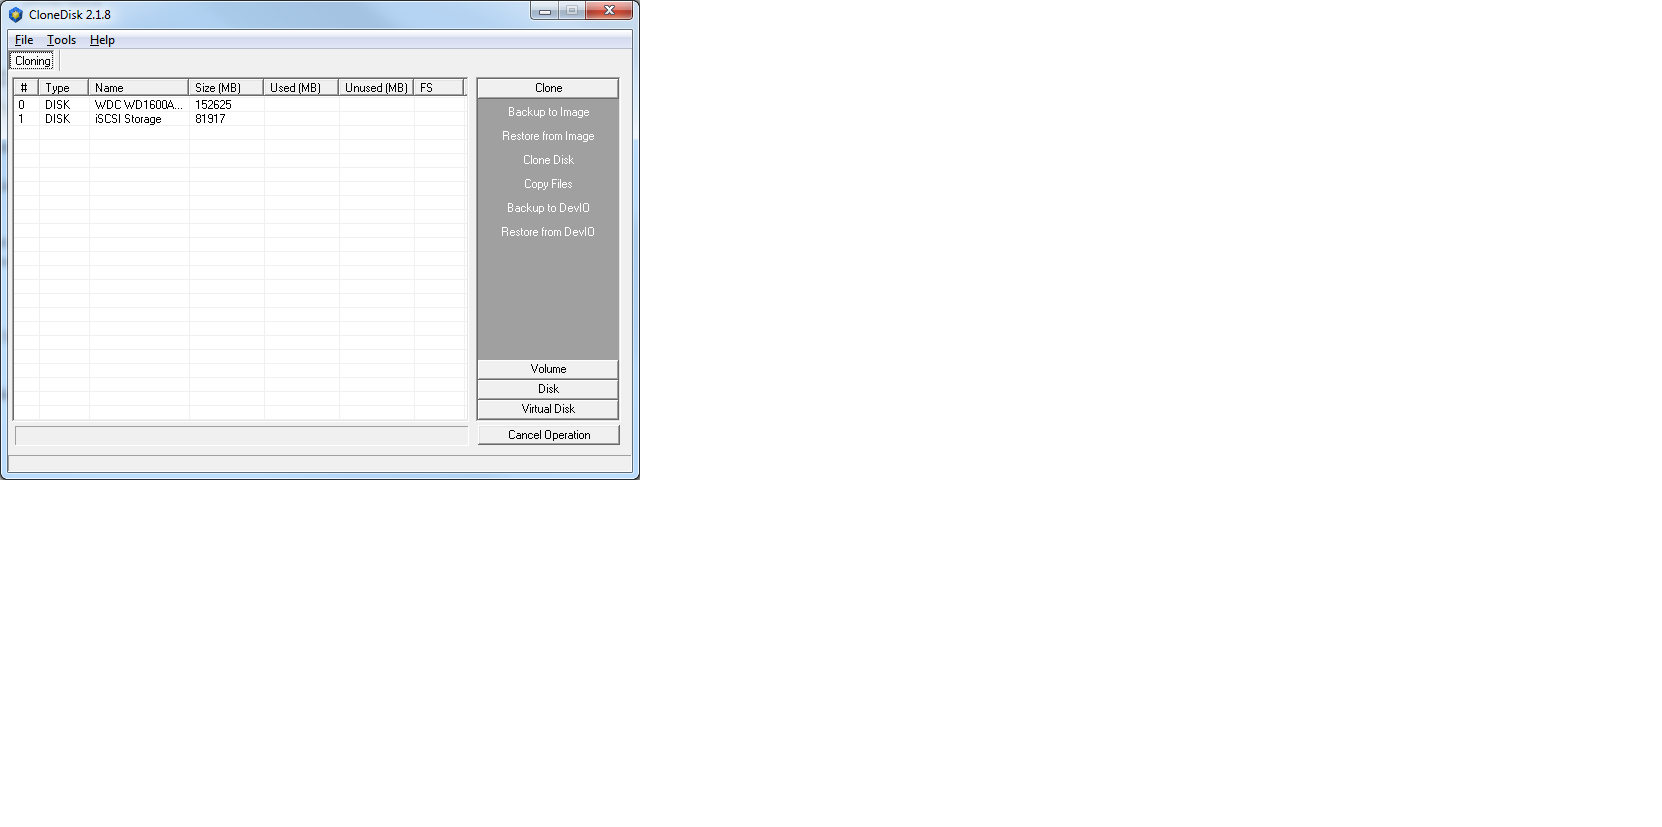
Lets see how to do it with CloneDisk (5 actions/steps)

1-Create/attach our parent

diff_vhd1

2-Create a file named parent.txt on the new logical drive

3-Detach it

At this point you should no longer introduce changes in your parent VHD until you decide to revert or merge

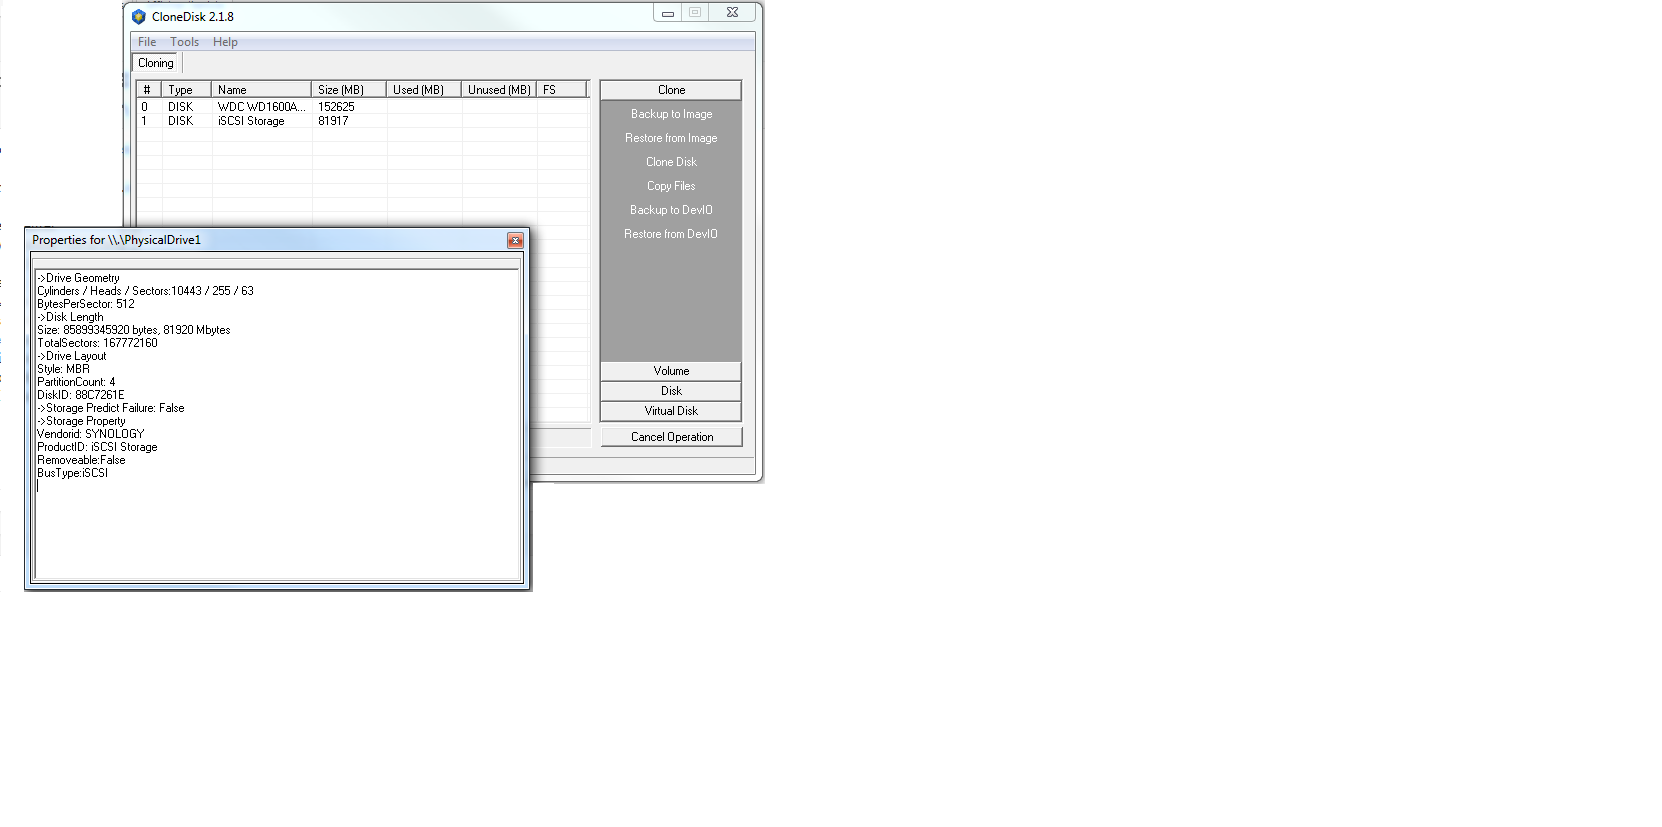
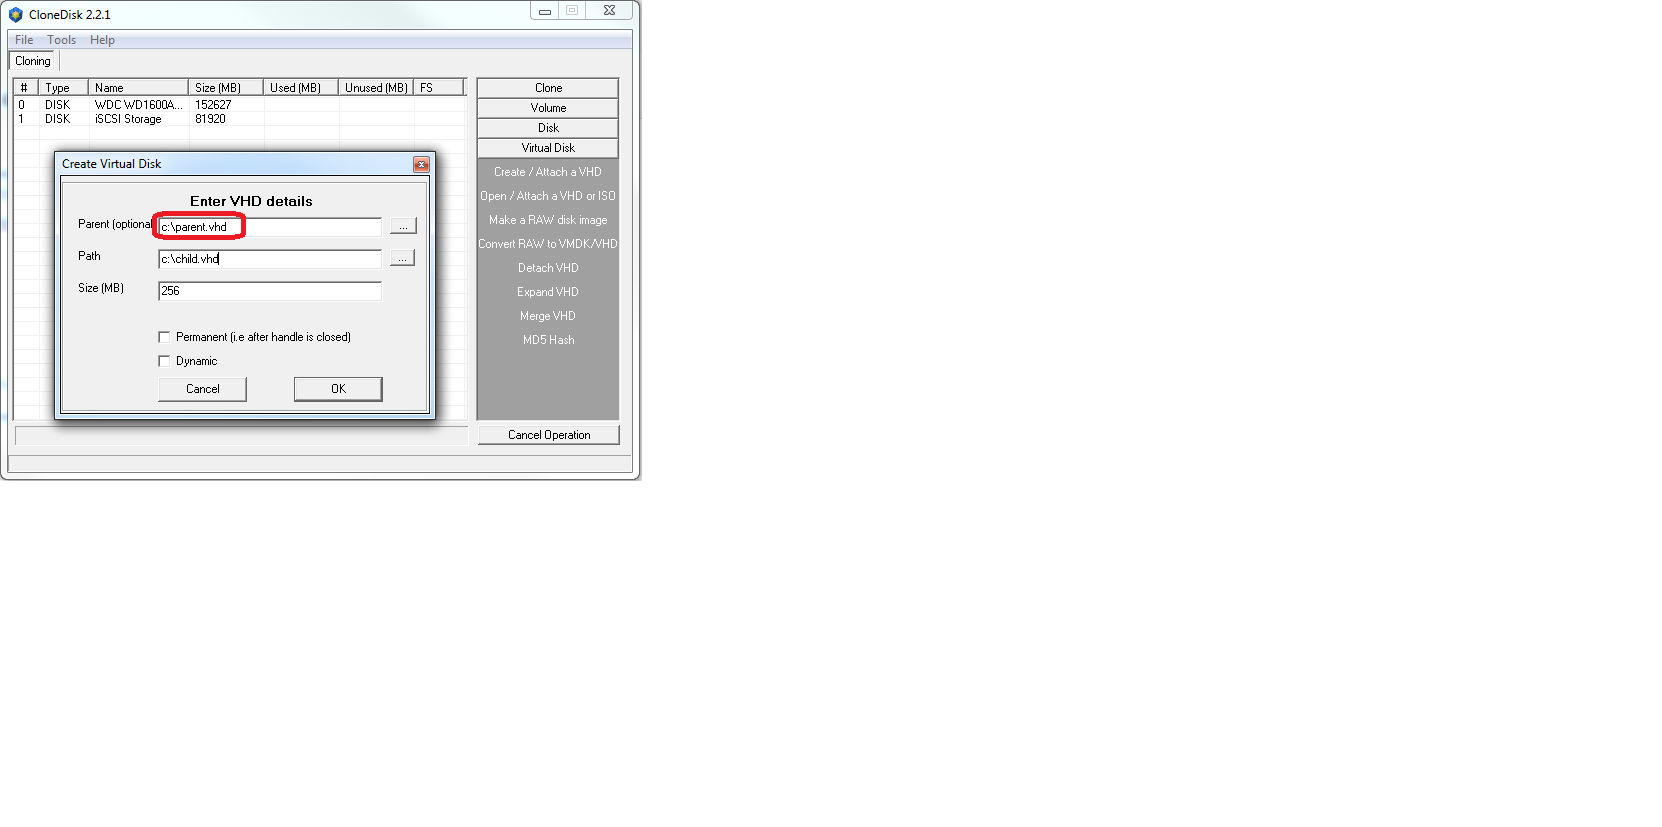
4-Create/attach our child but this time we will indicate which one is a parent (created in step 1)

You will get again a new logical drive and parent.txt will already be here.

diff_vhd2

5-Create a file named child.txt

That change will « only » be applied in child.vhd, not parent.vhd.

Now you can either merge it or revert it (i.e delete it) whenever you feel like it.


 Posted by at 20 h 21 min
Mai 132014
 

Libewf is a library to access the Expert Witness Compression Format (EWF). Read more here.
Also, read more about the Encase image file format here.

Lately I took interest into the EWF file format for my CloneDisk software.
I found a delphi unit implementing read only access to EWF files but it was (out)dated from 2010 using deprecated funtions.
I therefore decided to refresh (rewrite) it so that it uses the latest functions from the version 2 library and I also implemented a couple of extra functions like write, set header, set compression, etc.

EWF support for CloneDisk has the following benefits for now :
-the compression (at the expense of speed thus)
-it can be mounted later on
-it can be browsed later on

Later on, I could see other benefits :
-headers / metadatas such as author, os name, os build, description, etc
-md5/sha1
-multi threading (to get more speed)

Found the delphi project (sourcecode v1) here libewf.

Updated version (v2 / will work with delphi xe5 and 32/64 bits) : libewf.

libewf

Mai 102014


 Posted by at 20 h 13 min
Mai 102014
 

PartedMagic is a disk management solution.
It does disk partitioning, disk cloning, data rescue, disk erasing, benchmarking.
Note, since August 2013, the tool has required a fee to download.

Lets now see how to PXE boot this linux distribution.

For this we will use TinyPXE Server and IPXE.


First lets prepare our iPXE script (save it to rescue.ipxe)

#!ipxe
set boot-url http://${next-server}
kernel ${boot-url}/memdisk iso
initrd ${boot-url}/images/pmagic/pmagic_2013_02_28.iso
boot

Now, lets setup TinyPXE Server

pmagic

Now, lets boot !

Note :

-My iso is from february 2013, I cannot tell for sure it earlier or newer ISO’s will boot thru PXE

-This method (using memdisk) requires at least twice the size of the iso (lets round it up to 1 gb). if this is an issue, you may want to revert to booting pmagic filesquash.

 Posted by at 19 h 43 min
Mai 072014
 

Changes since last changelog :

Discuss it here. Download it here.

added : change diskid in partition editor
changed : increased buffersize from 64k to 512k to speed backuping process
changed : will write win8.1u1 mbr and bs (compatible with all previous windows NT)
added : md5 hash for file
added : hide_advanced boolean param in config.ini (options section)
added : screenshot
added : can remove an outlookbar button or page via the config.ini (outlookbar section)
added : can inject any MBR boot code
modified : changed all desktopcenter to screencenter
added : patch bytespersec / sectorsperclus / secreserved in boot sector
changed : bootsector patches for MSDOS5.0 (fat/fat32) as well (was only for oemid=NTFS)
changed : renamed offlinereg unit to uofflinereg
changed : changed window size to 640*480
changed : pagecontrol3 for more space in main screen
changed : disk/partition properties rewiewed (no access to mbr/bs anymore, all windows api)
added : disk/part properties in a separate window
changed : tabsheet4 removed (disk/part properties)
added : double click on the main listview will also display the disk/part properties window
changed : tabsheet8 removed
added : change diskid in mbr tab

clonedisk218_1


clonedisk218_2

 Posted by at 19 h 35 min
Mai 062014
 

This project is based on MistyPE.
It’s been scaled down and developed specifically for digital forensics acquisitions.
Mini-WinFE has been co-developed with Brett Shavers to facilitate a simplified method for building a Windows Forensic Environment (WinFE).

Download/Discuss it here.

How to use it? Easy :
-Launch winbuilder,
-Go to source tab,
-Select your source directory to point to your windows media installation dvd drive (E:\ for me),
-Click play,
-Retrieve your winpe iso in x:\Mini-WinFE\WinFE.Project.Output\.

 Posted by at 20 h 53 min
Mai 062014
 

There are cases where your operating system is not booting anymore but you really need to retrieve important/personal files.

You could boot a WinPE onto a USB key (using QuickPE and Rufus) to work locally on the faulty computer but you could also do it remotely, confortably settled from another O.S.

Here below the steps :

1-Lets make a WINPE out of  windows (7 or 8) iso/dvd (I use QuickPE) .

2-Boot onto this Winpe (I use rufus to « burn » the winpe iso onto USB).

3-Launch DevIO : from the WinPE command line, type devio -r 9000 \\physiscaldrive0 1 .
Note : the -r is for read only and physicaldrive0 for disk 0 and 1 for first partition.

quickpe2

4-Launch ImDisk : from a remote host command line, type imdisk -a -t proxy -o ip -f xxx.xxx.xxx.xxx -m X:
Note : replace xxx.xxx.xxx.xxx by the ip of your WinPE / faulty computer

recover2

5-At this stage, you should now have a new logical drive letter X: appearing on your remote host.
You can now recover your files remotely !

 Posted by at 12 h 49 min
Mai 052014
 

In a previous article, we had seen how to backup a disk (offline) with CloneDisk over the network using a windows share.
Thus, a windows share is not always handy and fast.
Lets see how to make a backup over the network easier and faster using DevIo.

Here below the different steps to backup or clone a (physical or logical) disk (hosting any operating system) using WinPE and CloneDisk + DevIO.

1.Getting tools
First, lets get the needed files and prepare our working folder :
QuickPE and unzip it to x:\quickpe.
CloneDisk and unzip it to x:\quickpe\extra

2.Preparing
Now, lets prepare our WinPE iso.
launch _RUN_ME.CMD.
If you have MS ADK or MS WAIK already installed then choose option 1 or 2.
If you dont have these (or have no idea what this is), choose option 4 or 6 if you an MS Windows ISO at hand, or 5 or 7 if you have a MS Windows DVD at hand.
Let the batch run.

quickpe2

3.Booting
At this point, you have an iso file in x:\quickpe\x86 named winxx.iso.
you can either burn it to cd/dvd (easiest path),
« burn » to a usb stick with rufus,
or (more complex) boot it thru pxe (using these guides).

4.Target
The target is the host where you will backup/dump your disk, over the network.
From a command line, launch devio 9000 c:\dump.img 0 0 .
Note that disk.img must exist and must be at least as big as the source disk : CloneDisk can do it for you (under virtual disk / make raw disk) or use the linux command : dd if=/dev/zero of=disk.img bs=268435456 count=1 (268435456 is 1024*1024*256=256MB).
Note that you can compile devio for different hosts (windows, linux, etc) or else you can also run the windows exe on ubuntu (needs wine) if you are lazy (like me).

devio2

5.Backuping
Once booted, ensure you have a correct network setup using PeNetwork : click on the info button.
Now, launch clonedisk from x:\extra\clonedisk folder, choose your source drive and lets backit up to a devio target (see step 4).

clonedisk_winpe1

devio3

devio4

Once CloneDisk has completed its backup, you should see Devio close its connection.

devio5

 Posted by at 17 h 26 min
Mai 042014
 

A few months ago I wrote an article about Olof’s Arsenal driver.

Now is time for a command line version of ImgMount GUI named ImgMountCMD.
Exe is about 50 kb and can do as much as the GUI version.
Moreover, both the GUI and the command line version have been tested in WinPE and work fine including installing the driver.

Discuss/download it here.

The syntax for the command line is the following :


ImgMountCMD file add path
ImgMountCMD file new path size(MB)
ImgMountCMD file shm name
ImgMountCMD file remove id
ImgMountCMD vm add path
ImgMountCMD vm new size(MB)
ImgMountCMD vm remove id
ImgMountCMD pm add path
ImgMountCMD pm new size(MB)
ImgMountCMD pm remove id
ImgMountCMD list
ImgMountCMD removall
ImgMountCMD driver check
ImgMountCMD driver install driver.inf
ImgMountCMD driver remove

 Posted by at 17 h 12 min
Mai 042014
 

MistyPE is an excellent WinPE generator based on Winbuilder.

It is minimalist (in a way it is easy and fast to build WinPE) but still very flexible so that one can add many extra softwares in there.

Download/Discuss it here.

How to use it? Easy :
-Launch winbuilder,
-Go to source tab,
-Select your source directory to point to your windows media installation dvd drive (E:\ for me),
-Click play,
-Retrieve your winpe iso in x:\MistyPE\MistyPE.Project.Output\.

 Posted by at 17 h 05 min