Jan 082018
 

Sharing a iPXE script (using wimboot) I am using these days along with Tiny PXE Server to boot winpe over the network on multiple platform : pcbios i386, pcbios x86_64, efi i386, efi x86_64.

Tiny PXE Server is serving by default pcbios ipxe.pxe and also, depending on the client architecture, serving the matching ipxe efi version.

See below my config.ini and a custom wimboot.ipxe script.

Discuss it here.


[dhcp]
proxydhcp=1
httpd=1
bind=1
root=\files
filename=ipxe.pxe
altfilename=wimboot.ipxe
[arch]
00006=ipxe-i386.efi
00007=ipxe-x86_64.efi
00009=ipxe-x86_64.efi


#!ipxe
#more about wimboot tips and tricks : http://ipxe.org/wimboot
set boot-url http://${dhcp-server}
#note : we are not going to use cpuid/arch
cpuid --ext 29 && set arch x64 || set arch x86
echo ${arch}
echo ${platform}_${buildarch}
goto ${platform}_${buildarch} || goto unknown
:pcbios_x86_64
kernel ${boot-url}/wimboot
initrd ${boot-url}/BOOTMGR.EXE bootmgr.exe
initrd ${boot-url}/BOOT/BCD BCD
initrd ${boot-url}/BOOT/BOOT.SDI BOOT.SDI
initrd ${boot-url}/SOURCES/x64/BOOT.WIM BOOT.WIM
boot
:pcbios_i386
kernel ${boot-url}/wimboot
initrd ${boot-url}/BOOTMGR.EXE bootmgr.exe
initrd ${boot-url}/BOOT/BCD BCD
initrd ${boot-url}/BOOT/BOOT.SDI BOOT.SDI
initrd ${boot-url}/SOURCES/x86/BOOT.WIM BOOT.WIM
boot
:efi_x86_64
kernel ${boot-url}/wimboot
initrd ${boot-url}/bootx64.efi bootx64.efi
initrd ${boot-url}/EFI/MICROSOFT/BOOT/BCD BCD
initrd ${boot-url}/BOOT/BOOT.SDI BOOT.SDI
initrd ${boot-url}/SOURCES/x64/BOOT.WIM BOOT.WIM
boot
:efi_i386
kernel ${boot-url}/wimboot.i386
initrd ${boot-url}/bootia32.efi bootia32.efi
initrd ${boot-url}/EFI/MICROSOFT/BOOT/BCD BCD
initrd ${boot-url}/BOOT/BOOT.SDI BOOT.SDI
initrd ${boot-url}/SOURCES/x86/BOOT.WIM BOOT.WIM
boot
:unknown
echo Unknown platform ${platform}_${buildarch}
Jan 082018
 

If like me you have an old computer and dont want to install the Ubuntu update for Meltdown and Spectre ubuntu update :

  • sudo vi /etc/default/grub
  • add nopti to GRUB_CMDLINE_LINUX_DEFAULT (there should be a list of parameters already like « nomdmonddf nomdmonisw nomdmonddf nomdmonisw »)
  • sudo update-grub
  • sudo reboot

check that nopti is there with cat /proc/cmdline

Jan 032018
 

On removable medias (such as USB disks), Windows can only access one partition at a time.
This is a driver limitation (which you can actually work around by using another driver but this is not the point of this article).

Here below one way to work around this.

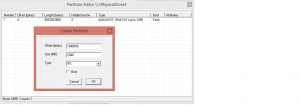
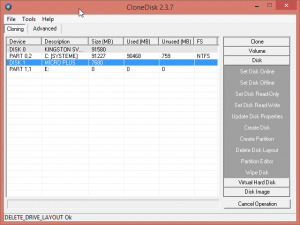
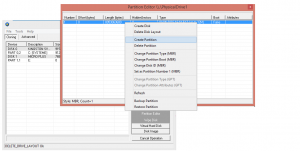
First, lets select our device in CloneDisk and under the disk (right) menu : (1) put it offline, (2) delete disk layout, (3) create 2 (or more) partitions, (4) put your disk online.

Note that if you disk is already multi partitioned, you can skip the above 4 tasks and go the last part of this article which is about accessing the second partition.

Create one partition, and repeat this task once.

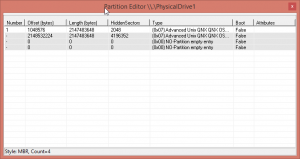
Once done (i.e partitions are created), it should looks like this once done (2 times 2 GB partitions).

In CloneDisk main window, put your disk online : windows should detect a new volume and offer to format it (if not, remove and reinsert media).

Create a folder named ‘part1’ (this is only a witness/indicator)

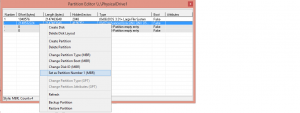
Now, lets see how we can access the second partition : Go back to CloneDisk -> Disk -> Partition Editor, select your second partition and « set as partition number 1 ».

Again, windows should detect a new volume (the previous volume ‘part 1’ has disappeared) and offer to format it (if not, remve and reinsert media) – unless you have skipped the first part of this article.

Create a folder named ‘part2’.

You can now switch back and forth between your partitions on your removable media by using CloneDisk -> Disk -> Partition Editor, select your partition and « set as partition number 1 ».

 Posted by at 20 h 31 min