Août 172013
 

Here below the different steps to backup or clone a (physical or logical) disk (hosting any operating system) using WinPE and CloneDisk.

1.Getting tools
First, lets get the needed files and prepare our working folder :
QuickPE and unzip it to x:\quickpe.
CloneDisk and unzip it to x:\quickpe\extra

2.Preparing
Now, lets prepare our WinPE iso
Generate your WinPE iso using any of the option that suit you best : use WAIK or ADK or your sytem WinRE or a DVD or an ISO …

3.Booting
At this point, you have an iso file in x:\quickpe\x86 named winxx.iso.
you can either burn it to cd/dvd (easiest path),
« burn » to a usb stick with rufus
or (more complex) boot it thru pxe (using these guides).

4.Networking
This step is needed only if you intend to backup your drive to an image file over a network drive.
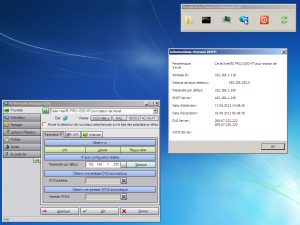
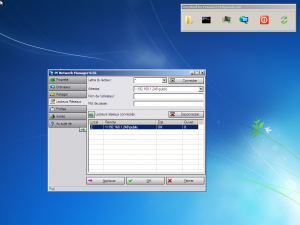
Once booted, ensure you have a correct network setup using PeNetwork : click on the info button.
Provided, you have a network connectivity, then map a network drive, still using PeNetwork.

clonedisk_winpe1

clonedisk_winpe2

5.Backuping
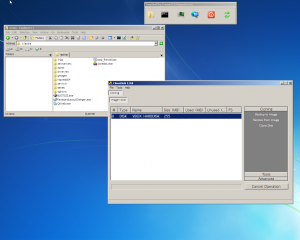
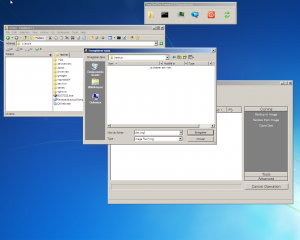
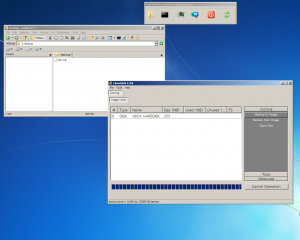
Now, launch clonedisk from x:\extra folder, choose your source drive and either back it up to your network drive or clone your source drive to a new target drive.
clonedisk_winpe3

clonedisk_winpe4

clonedisk_winpe5

 Posted by at 14 h 45 min  Tagged with:
Août 132013
 

needed :
tiny pxe server
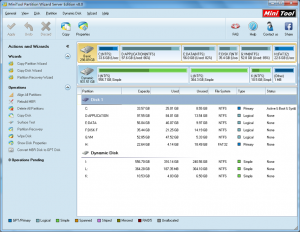
Partition Wizard

put pwhe8.iso in x:\pxe\iso

use the below ipxe script :

#!ipxe
set boot-url http://${dhcp-server}
initrd ${boot-url}/iso/pwhe8.iso
kernel ${boot-url}/memdisk iso
boot

name it pwhe8.ipxe and put it in x:\pxe

put ipxe-undionly.kpxe in x:\pxe

launch tiny pxe server with the following settings (leave other settings untouched) :
tick « httpd »
boot filename = ipxe-undionly.kpxe (use the browse files and folders « … » button)
tick « filename if user-class=gPXE or iPXE » = http://${dhcp-server}/pwhe8.ipxe.ipxe
push the online button

pxe boot your computer and here we go

homepw

 Posted by at 19 h 26 min
Août 132013
 

needed :
tiny pxe server
Clonezilla

open clonezilla.iso in winrar (or any other iso reading capable tool).
extract live folder to x:\pxe\iso\clonezilla

use the below ipxe script :

#!ipxe
set boot-url http://${dhcp-server}
kernel ${boot-url}/ISO/clonezilla/live/vmlinuz boot=live config noswap nolocales edd=on nomodeset vga=788 nosplash noprompt fetch=http://${dhcp-server}/ISO/clonezilla/live/filesystem.squashfs
initrd ${boot-url}/ISO/clonezilla/live/initrd.img
boot

name it clonezilla.ipxe and put it in x:\pxe

put ipxe-undionly.kpxe in x:\pxe

launch tiny pxe server with the following settings (leave other settings untouched) :
tick « httpd »
boot filename = ipxe-undionly.kpxe (use the browse files and folders « … » button)
tick « filename if user-class=gPXE or iPXE » = http://${dhcp-server}/clonezilla.ipxe
push the online button

pxe boot your computer and here we go

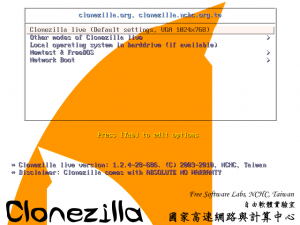
clonezilla

 Posted by at 19 h 20 min
Août 132013
 

needed :
tiny pxe server
winnfsd
redo backup recovery

open redobackup.iso in winrar (or any other iso reading capable tool).
extract casper folder to x:\pxe\iso\redobackup (or any path that suit you)

launch winnfsd with the following :
winnfsd.exe -id 0 0 x:\pxe\iso\redobackup
note : adapt the above path with your own path

use the below ipxe script :

#!ipxe
set boot-url http://${dhcp-server}
kernel ${boot-url}/iso/redobackup/casper/vmlinuz boot=casper netboot=nfs nfsroot=${dhcp-server}:/x/pxe/ISO/redobackup
initrd ${boot-url}/iso/redobackup/casper/initrd.lz
boot

note : adapt /x/pxe/ISO/redobackup to your own path.
name it redo.ipxe and put it in x:\pxe

put ipxe-undionly.kpxe in x:\pxe

launch tiny pxe server with the following settings (leave other settings untouched) :
tick « httpd »
boot filename = ipxe-undionly.kpxe (use the browse files and folders « … » button)
tick « filename if user-class=gPXE or iPXE » = http://${dhcp-server}/redo.ipxe
push the online button

pxe boot your computer and here we go

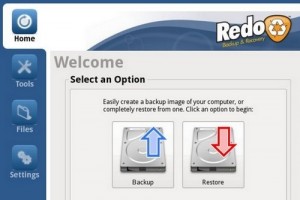
Redo-Backup-Recovery

 Posted by at 15 h 02 min
Août 122013
 

I have been playing with pxe booting for a while, first starting with pxelinux, then gpxe and lately with ipxe.

I am mostly a windows user and as an IT often needs a quick (=no install) and portable (=run from USB) dhcp server including a tftp server and a http server offering me then pxe booting.
I could use tftp32 or serva but i like to make my own tools and these 2 were missing some features here and there.

So here comes a small portable dhcp server including a tftp and a http server.

This is freeware (and will always be), should be opensource and the unique here idea is to share and contribute.

-dhcp daemon supports an alternative filename based on the user-class thus enabling chainloading (gpxe->pxelinux, ipxe->script, etc), and also support settings dhcp options (which can then be used by your boot loader)
-tftp daemon supports tsize and blksize commands.
-http daemon support head, range (mandatory for ipxe sanboot options) and over 2gb iso.
-new in version 1.0.0.7 : BINL (RIS & WDS) support
-new in version 1.0.0.10 : DNS daemon

The root home of tftp and http is the folder where you main pxe loader sits.
I put all my iso files in a sub folder called images.
I put all my wim files in a sub folder called sources.
I put all my other loaders, in case I want to chain load, in next to my main loader (bootmgr, pxelinux, gpxe, grldr, etc)

In the attached screenshot, i load ipxe then chainloads a script (menu.ipxe).
In the script 3 different methods : the classic memdisk, a newer approach with sanboot and a new kid on the block wimboot.

More info about these loading methods here :
http://www.syslinux.org/wiki/index.php/MEMDISK
http://ipxe.org/cmd/sanboot
http://ipxe.org/wimboot

Side note about ipxe+sanboot+http : I am big fan.
I have always been looking for a quick and efficient boot from lan methods and this is one is great : executes as it read and faster than memdisk since no preloading of the ISO is required.
iPXE reaches 50/60 MBits/secs on my lan.

« Voila ».

Download : http://reboot.pro/files/file/303-tiny-pxe-server/

Erwan

 Posted by at 13 h 38 min