In April 2014, MS has updated Windows 8.1 to Windows 8.1 Update 1. (buildlab 6.3.9600.17031 and up).
One feature which was not very much marketed was the Windows Image File Boot also named Wimboot.
You can read more here on MS Web site.
In short, here is what MS says :
Windows image file boot (WIMBoot) lets you set up a PC so that it runs directly from a compressed Windows image file (WIM file).
WIMBoot can significantly reduce the amount of space used by Windows files. This helps you provide more free space to users, and helps you manufacture Windows on PCs with smaller drives.
So lets see how we can use this new feature :
We’ll assume you have already installed your Windows 8.1 (You can download an evaluation version here).
1-Lets make a WINPE out of the Windows 8.1 update 1 iso/dvd (I use QuickPE).
2-Boot onto this Winpe (I use rufus to « burn » the winpe iso onto USB).
3-Capture the installation : dism /capture-image /imagefile:e:\install.Wim /capturedir:c:\ /name:install /wimboot
Note here : e:\ is a second partition on my hard drive
4-Format C drive (so that we start from a fresh drive)
5-Apply our wim file (from step 3) to my C drive : dism /apply-image /imagefile:e:\install.Wim /index:1 /applydir:c:\ /wimboot
Note : after step 5, I had to do a bcdboot X:\windows /s X:\ where X is the partition where you just applied your WIM file.
This applies only if you have one unique boot & system partition which is nowadays rarely the case as Windows always created a hidden/reserved partition for the boot files.
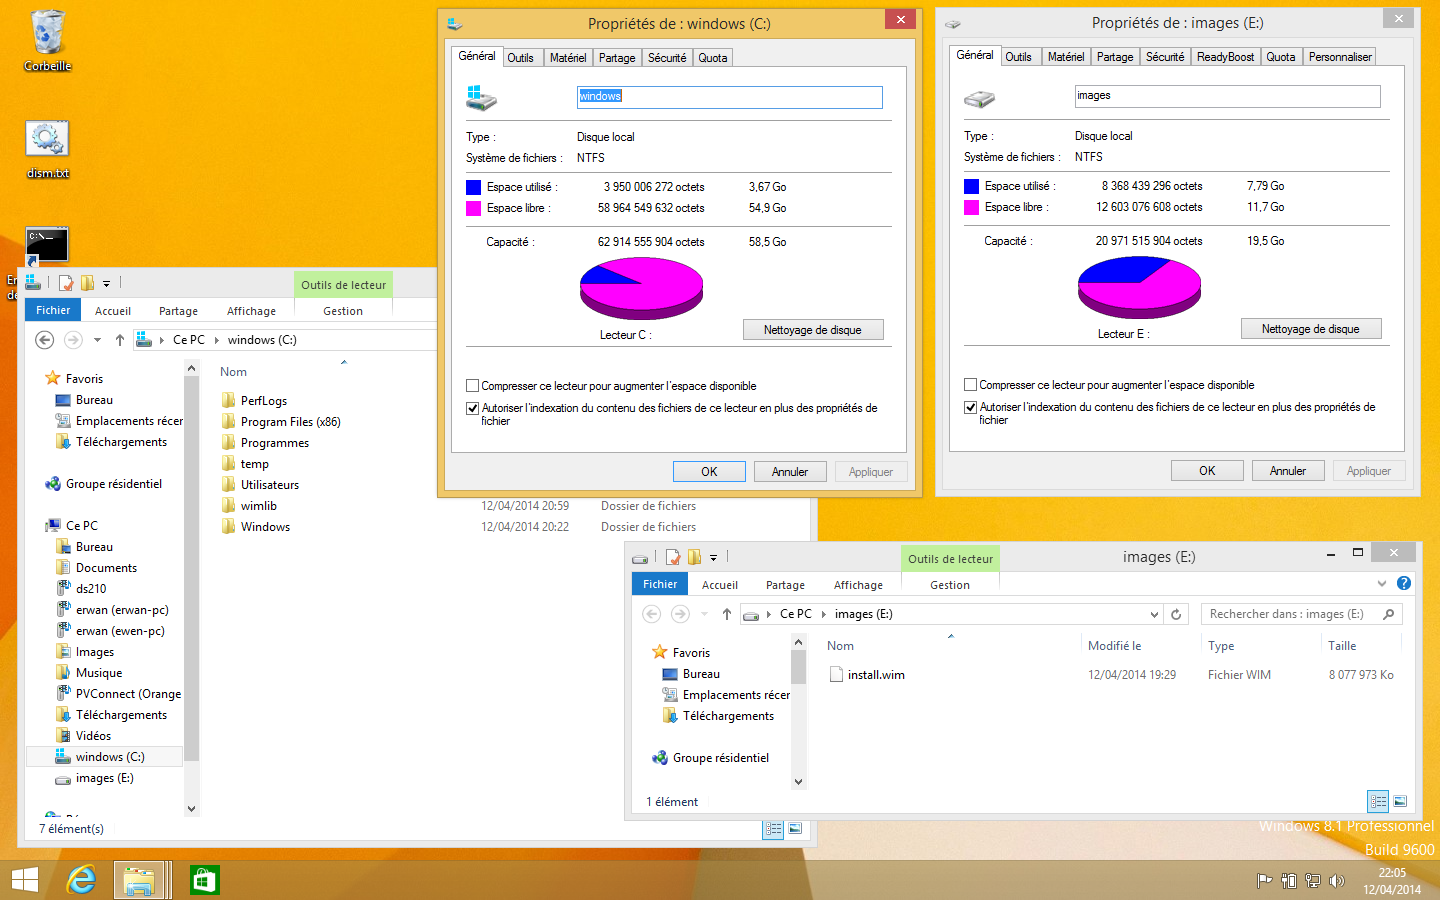
And voila, you should end up with a C drive occupied by only 3GB (when it was about 20GB minimum before step 1).
This should work on X86 or X64 (tested), with a UEFI or MBR (tested) partition, with SSD drive or standard drive (not tested).
Here below a picture showing my final / wimboot setup.
can you take a default install wim and apply it this way, any special formatting necessary?
Hi,1 attribute flag to a wim file afterwards (to be tested, if yes that would the whole process even simpler!).
I believe (99% sure) that the install wim needs to be captured with the /wimboot parameter.
Although one could simply add the
No special formatting needed : I used a standard MBR NTFS partition.
Regards,
Erwan
so i used your quick pe, but it is telling me that dism doesnt support the wimboot flag, so what do i need to update?
Which windows 8.1 media did you use?
To appy/restore a WIM file with the wimboot flag you need the latest windows 8.1 update 1.
To launch a windows installed (restored) with wimboot, windows 8.1 and windows 8.1 update 1 will both work.
OK, so I took the following steps:
1) Restored my Surface Pro 2 to the factory image.
2) Installed MSU’s ***442 and ***355 to upgrade the Surface Pro 2 to Windows 8.1 Update 1.
3) Created Windows PE 5.0 using AIK Windows 8.1 Update 1.
4) Upgraded this PE 5.0 to 5.1 by installing MSU’s ***442 and ***355 on it.
5) Booted into the Surface Pro 2 from the PE 5.1 USB.
6) Executed the commands above. Note: I created a separate D: partition for the WIM image.
7) Rebooted.
8) The Surface Pro 2 constantly goes into automatic repair! And WIMBoot never seems to work.
What gives, any ideas?
Hi Simon,
Run (from the command line) the following command ver as i’d like to make sure your system is running windows 8.1 update 1.
Reg query "HKLM\SOFTWARE\Microsoft\Windows NT\CurrentVersion" /v buildlabAbout your winpe, dont bother making a win8.1u1 but use this tutorial using wimlib-imagex.
Regards,
Erwan
maybe you could mention in your tutorial « SET WIM_SKIP_WIMBOOT_CHECK=1 » if you using unmodified install.wim or you may come across with dism error in step 5
Thanks for sharing this tip !
I have built truly one-click software which converts any pre-existing Windows 8.1 Update 1 system to WIMBoot. This tool is called DoubleSpace and is available from http://www.zipmagic.co/doublespace.html.
You will not need external storage, a Windows PE environment, manually created images – or anything of the sort – to use DoubleSpace. DoubleSpace runs in one-click, and all you need to choose is compression strength – 4 are available, between MaxSpeed – MaxSpace. No lengthy tutorials to follow at all.
You can even recompress a disk that has been previously compressed.
I trust you will enjoy using the tool as much as I enjoyed building it. I welcome any feedback!
[…] […]
WOW! te change is phenomenal! My SSD space utilization went from 45.0gb to 4.8gb in a few minutes!
Now the « install.wim » file created was stored on my secondary HDD. Can I delete it no that everything works, or will I have a problem?
thanks
Hi,
By no mean delete the wim file or else you wont be able to boot anymore.
This wim file contains your base installation.
Regards,
Erwan
yes – i figured it out. But because I wanted to keep all the OS files on the SSD, I used a linux livecd to move to format the c: drive, move the .wim file to the root of c: and then re-expand the install.wim file with a winpe usb stick. now my os drive is down to ~34gb (complete with all my programs, ms office, etc) – original size was ~45gb
This is sick!
I can apply the Wim file (stored on ssd) to a VHDx file (stored on a normal harddisk), and use the VHDx for native boot.
In this way i can create many test enviroments that boot fast and the difference is stored on the normal harddisk.
I tryed to do this before with normal VHDx and differencing disk, but there are 2 problems:
1) Parent/child must reside in the same volume (so on the ssd if i want fast boot times).
2) The scenario of trim + native VHDx boot is unclear (so native booting could destroy the ssd after some time).
This solved my problem!
One question, the boot time is worse compared to normal ssd boot times (maybe 6/8 seconds more), is this due to wim compression? (tomorrow i think i will try to use an uncompressed win to see the difference)
yes, wimboot will require some extra cpu which could slow down the boot process.
although, as wim boot also requires less i/o, usually the boot time is more or less the same.
wimboot main feature is the space saving, not the boot time.
ive been at this for hours!!! i can get the image to capture and i can apply it but it kees destroying my bootrec and i havnt been able to fix it… i am.. doing yet another install of windows 8.1 and this time i am backing up the partition info and when it kills it i will just restore it from the backup file… i see all the files on c:\ that are supposed to be there… this has too work!!!
http://windowswimboot.blogspot.com.au/2015/09/windows-81-wimboot-install-pack-solved.html
Pre-made winPE 5.1 with all wimboot files
Install.wim and Winre.wim (STRAIGHT FROM windows 8.1 install dvd)
step by step hdd/install drive setup instructions
applying of .wim image
recovery partition and .wim file step by step
Once the pre-made files have downloaded this process will only take you 10-15MINS ..
Simple setup..