Here below some drafts notes on how to boot WINPE on a UEFI computers.
1/Files you need from your windows x64 dvd
-\efi\boot\bootx64.efi file (1)
-\efi\boot\bcd file (2)
-\efi\boot\boot.sdi file (3)
-\efi\microsoft\boot\fonts folder (4)
-\sources\boot.wim (5)
If you dont find bootx64.efi, you can use bootmgfw.efi which is in install.wim on your dvd (sources folder).
Use 7zip to extract this file from the wim file and rename it to bootx64.efi
2/Files you need in your tftp root
-get in your tftp root
put bootx64.efi (from 1)
-create a SOURCES folder
put boot.wim in there (from 5)
-create a BOOT folder
put boot.sdi in there (from 3)
put bcd in there (from 2) / applies for Win8
-create a EFI/MICROSOFT/BOOT folder
put bcd in there (from 2) / applies for Win7
put the FONT folder in there (from 4)
You should end up with the following :
=>ROOT
-bootx64.efi
==>SOURCES
==boot.wim
==>BOOT
==boot.sdi
==bcd (for win8)
==>EFI/MICROSOFT/BOOT
==bcd (for win7)
===>FONTS
===*.ttf
3/Things you need to do on your boot.wim
Add the following winpeshl.ini (create it with notepad) file in your boot.wim (system32), making it a « cheap » winpe.
To modify your boot.wim, you can either mount/change/commit it with DISM (from the command line), or with CloneDisk or else modify it with wimlib :
wimlib-imagex update boot.wim 1 --command="add CustomWinpeshl.ini \Windows\System32\winpeshl.ini"
[LaunchApps]

%SYSTEMDRIVE%\Windows\system32\startnet.cmd

%SYSTEMDRIVE%\windows\system32\cmd.exe
4/Things you need to do in your PXE Server :
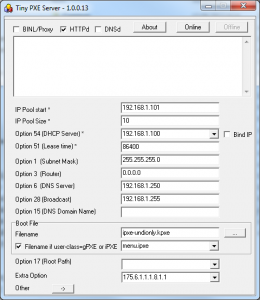
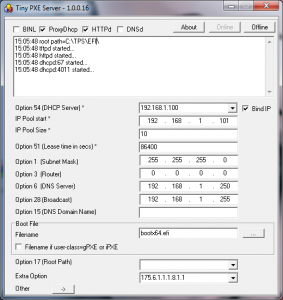
Set bootx64.efi as the bootp filename.
The UEFI + PXE boot process will be the following :
–pxe->bootx64.efi (from windows install dvd)->bcd (pointing to winload.efi)->boot.wim (x64 only)
as opposed to a legacy bios computer :
–pxe->pxeboot.n12 (from windows install dvd)-> bootmgr.exe -> bcd (pointing to winload.exe) -> boot.wim
Site note : you can use option dhcp 252 to decide which BCD file to load.
Can be handy when you want to switch from a UEFI computer to a legacy BIOS computer : efi\microsoft\boot or boot\bcd
side note : you can check if you booted on uefi with the following reg query HKLM\System\CurrentControlSet\Control /v PEFirmwareType Will output 0x1 for bios, 0x2 for uefi.
Cheers,
Erwan
Note that the following would aso work : PXE-> IPXE.efi ->MS Bootx64.efi ->BCD (winload.efi) ->Boot.wim (x64).
Ipxe script
#!ipxe

#change with you dhcp or proxydhcp server

set next-server 192.168.1.11

set filename boot/x64/bootmgfw.efi

chain tftp://${next-server}/${filename}
And changes to apply to your BCD : bcdedit.exe /store my.bcd /set {bootmgr} nointegritychecks yes
