Still on my journey to a wordclock…
In the previous article, we have seen how to use a shift register to control up to 8 digital outputs (or more if you cascade IC’s).
One drawback in the previous setup is that we had to use one transistor per digital output (to control a device powered by another source).
That is 8 extra transistors, 8*3 extra wires, etc : not very practical and especially if we intend to control several shift registers IC’s. (i plan on using 3 in my wordclock project)
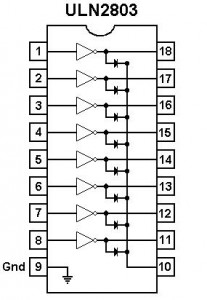
So this is where the ULN2803 comes in : 8 NPN transistors and one common ground in one integrated circuit.

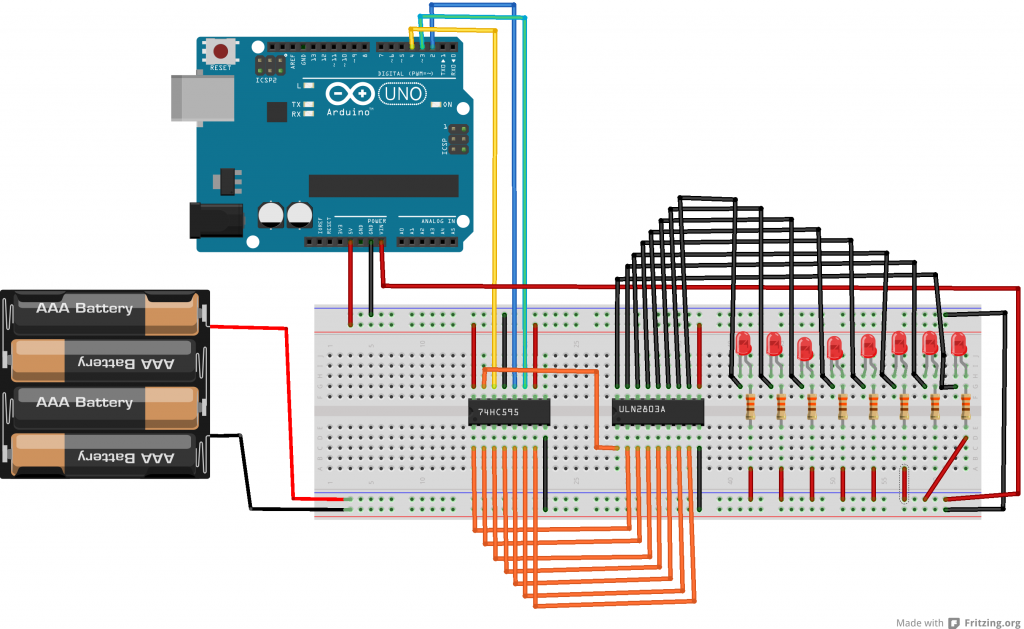
See below a refreshed schema (compared to the previous article). Note that I have decided to power my IC’s with my (regulated) Arduino 5v but I could as well have used my battery pack power.
Our 74HC595 will control our ULN2803 (by sending HIGH or LOW on the input) which in turn will drive the current thru each output/led.

the Arduino sketch :
//the pins we are using
int latchPin = 2;
int clockPin = 3;
int dataPin = 4;

void setup() {
  //set all the pins used to talk to the chip
  //as output pins so we can write to them
  pinMode(latchPin, OUTPUT);
  pinMode(clockPin, OUTPUT);
  pinMode(dataPin, OUTPUT);
}

void loop() {
  for (int i = 0; i < 8; i++) {

    //take the latchPin low so the LEDs don't change while we are writing data
    digitalWrite(latchPin, LOW);

    //shift out the bits
    shiftOut(dataPin, clockPin, MSBFIRST, i);

    //take the latch pin high so the pins reflect
    //the data we have sent
    digitalWrite(latchPin, HIGH);

    // pause before next value:
    delay(1000);
  }
}

