Résultats de recherche : esp

Mar 032015
 

These days it is pretty easy to setup a Home Theater PC using a cheap computer (raspberry being my preferred choice).

Still, the remote control is many times the weak point.
It is easy to buy or refurbish an infrared remote transmitter, it is less easy/cheap to find an infrared receiver.
Thus, you can find some cheap telco+receiver like these :
amazon
ebay

I then thought it would be fun/interesting to use an arduino for this.

Quickly googling, I found 2 ways to achieve this :
-turn my arduino into a HID device (probably the cleanest way but more complex) thru the use of the v-usb firmware
-have the arduino send (over serial) the expected datas to LIRC (less complex but more prone to errors)

Lets do some mad googling and collect some interesting pointers

-setup LIRC and a FDTI232 adapter : here
-the arduino IRRemote lib as you will need to decode the incoming signals : here
-some arduino code which seems to turn the arduino into a lirc receiver : here
-another possible interesting thread : here
-a similar project with interesting links especially around irman protocol : here
-similar project using IRMAN protocol : here
-related, on attiny85 : here

-v-usb track : here

Juin 072014
 

Still on my journey to a wordclock…

In the previous article, we have seen how to use a shift register to control up to 8 digital outputs (or more if you cascade IC’s).

One drawback in the previous setup is that we had to use one transistor per digital output (to control a device powered by another source).
That is 8 extra transistors, 8*3 extra wires, etc : not very practical and especially if we intend to control several shift registers IC’s. (i plan on using 3 in my wordclock project)

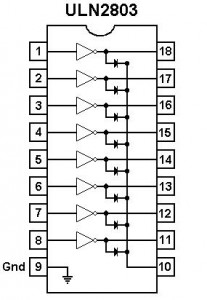
So this is where the ULN2803 comes in : 8 NPN transistors and one common ground in one integrated circuit.

uln2803

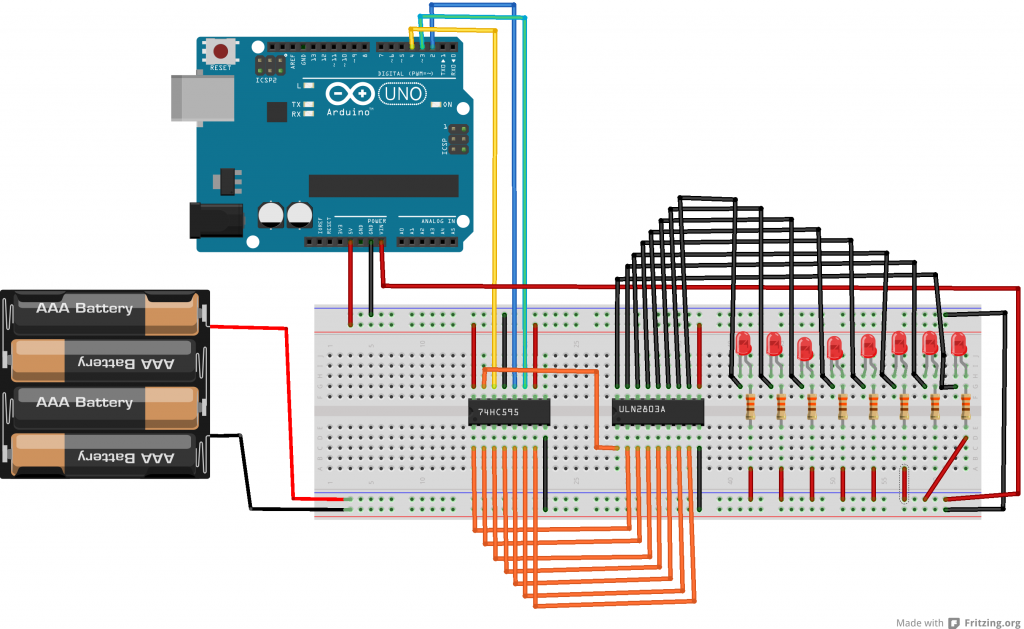
See below a refreshed schema (compared to the previous article). Note that I have decided to power my IC’s with my (regulated) Arduino 5v but I could as well have used my battery pack power.
Our 74HC595 will control our ULN2803 (by sending HIGH or LOW on the input) which in turn will drive the current thru each output/led.

uln2803a_bb

the Arduino sketch :

//the pins we are using
int latchPin = 2;
int clockPin = 3;
int dataPin = 4;
 
void setup() {
  //set all the pins used to talk to the chip
  //as output pins so we can write to them
  pinMode(latchPin, OUTPUT);
  pinMode(clockPin, OUTPUT);
  pinMode(dataPin, OUTPUT);
}
 
void loop() {
  for (int i = 0; i < 8; i++) {
 
    //take the latchPin low so the LEDs don't change while we are writing data
    digitalWrite(latchPin, LOW);
 
    //shift out the bits
    shiftOut(dataPin, clockPin, MSBFIRST, i);  
 
    //take the latch pin high so the pins reflect
    //the data we have sent
    digitalWrite(latchPin, HIGH);

    // pause before next value:
    delay(1000);
  }
}
Mai 072014
 

Changes since last changelog :

Discuss it here. Download it here.

added : change diskid in partition editor
changed : increased buffersize from 64k to 512k to speed backuping process
changed : will write win8.1u1 mbr and bs (compatible with all previous windows NT)
added : md5 hash for file
added : hide_advanced boolean param in config.ini (options section)
added : screenshot
added : can remove an outlookbar button or page via the config.ini (outlookbar section)
added : can inject any MBR boot code
modified : changed all desktopcenter to screencenter
added : patch bytespersec / sectorsperclus / secreserved in boot sector
changed : bootsector patches for MSDOS5.0 (fat/fat32) as well (was only for oemid=NTFS)
changed : renamed offlinereg unit to uofflinereg
changed : changed window size to 640*480
changed : pagecontrol3 for more space in main screen
changed : disk/partition properties rewiewed (no access to mbr/bs anymore, all windows api)
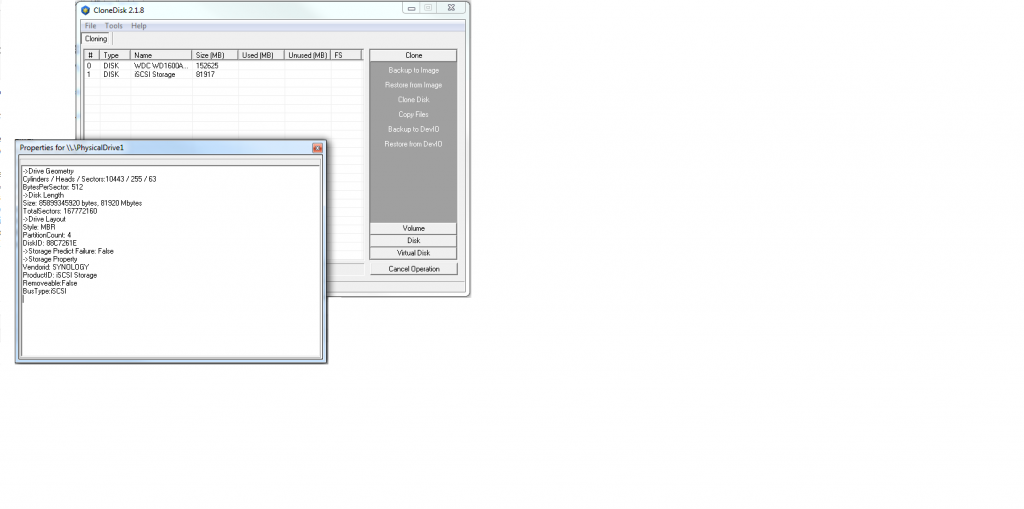
added : disk/part properties in a separate window
changed : tabsheet4 removed (disk/part properties)
added : double click on the main listview will also display the disk/part properties window
changed : tabsheet8 removed
added : change diskid in mbr tab

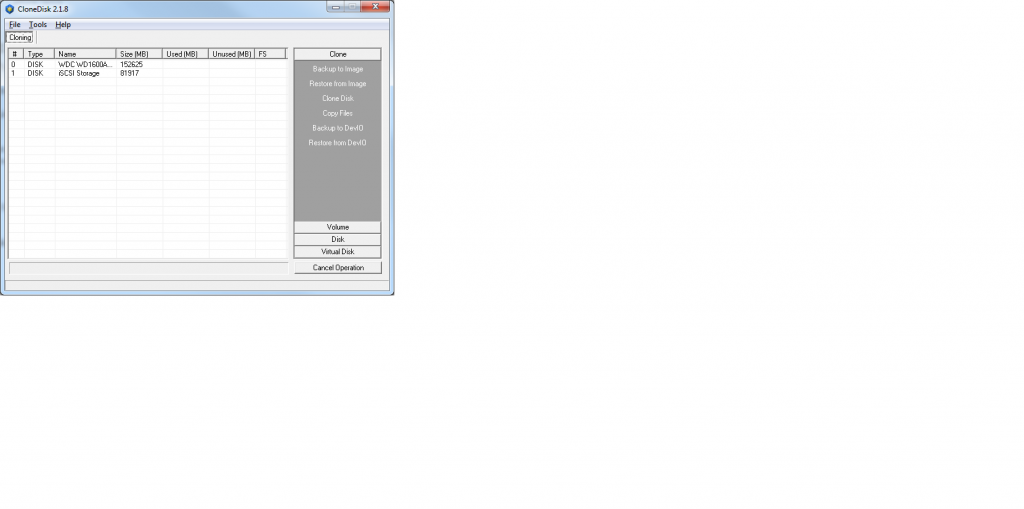
clonedisk218_1


clonedisk218_2

 Posted by at 19 h 35 min
Jan 252014
 

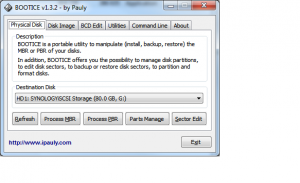
BOOTICE is a powerful boot-related utility.
It’s desired to manipulate (install, backup, restore) the MBR and PBR of disks (or disk images), to partition and format disks, to edit disk sectors in hexadecimal, to erase all the data on your disk or logical drive (by filling with customizable characters), to edit Grub4DOS boot menu, and to edit BCD file of Windows NT 6.x.

2013.12.10 v1.3.2.1
1. Fixed the bug that compacting VHD doesn’t work on Windows 7.

◆ 2013.12.07 v1.3.2
1. VHD/VHDX supporting. Now you can create, mount or unmount, resize, compact, reset the parent VHD file for VHD/VHDX files.
2. Better partition formatting speed, especially for NTFS.
3. Allow formatting as FAT32 on a partition larger than 32GB.
4. Fixed a bug that cuases wrong total sectors of VHD files.
5. When installing GRUB4DOS/WEE MBR, the choice « Install NT6 MBR to the 2nd sector » was checked initially.

Find it here.

bootice

Jan 252014
 

A must have.

Get it here.
Discuss it here.

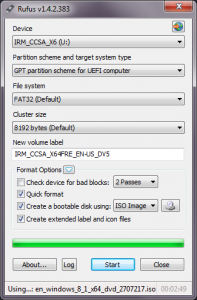
Rufus is an utility that helps format and create bootable USB flash drives, such as USB keys/pendrives, memory sticks, etc.

It can be especially useful for cases where:

you need to create USB installation media from bootable ISOs (Windows, Linux, UEFI, etc.)
you need to work on a system that doesn’t have an OS installed
you need to flash a BIOS or other firmware from DOS
you want to run a low-level utility

rufus_en

 Posted by at 14 h 13 min  Tagged with:
Nov 282013
 

In article 13, we made our first steps with Farseer Physics Engine (FPE).
We had create a world and 2 objects (a floor and boxes going thru gravity).

This time, lets create a body from a texture (no more a simple shape like a rectanle).
Lets also add he ability to move that body around with our mouse by using a mouse joint.

Have a look at the method CreateFromTexture in the DrawablePhysicObject class : in short, it creates a polygon from a texture.
Have a look at the update method where we use a FixedMouseJoint.
Also, see how easy it is to add extra objects like 2 extra floors.

Side note, finding documentation on FPE can sometimes be tedious, especially on latest 3.5 version where significant changes were introduced.
Still, here is a good start (although meant for 3.3).
Also, the box2d manual is usefull to understand concepts.
And to close this parenthesis around documentation, the farseer samples are very instructive as well.

Look at the video below to illustrate all this : body from texture, mouse joint.

 Posted by at 22 h 34 min
Nov 242013
 

In previous articles, we have seen many basics which should help to make a game : scrolling, moving shapes, collision, inputs (mouse, keyboard, gamepad)…

However, you may sometimes need to implement some physic principles : gravity, friction, restitution, etc.

This is where Farseer Physics Engine comes to the rescue.
Farseer Physics Engine is a collision detection system with realistic physics responses.

2 importants concepts to start with :
World
The world object is the manager of it all. It iterates all the objects in the world each time you call the Step() function and makes sure everything is consistent and stable.
Body
The body keeps track of world position. It is basically a point is space that is affected by forces such as impulses from collisions and gravity.

Lets add a project reference to farseer (note : I used msbuild /property:configuration=release « Farseer Physics XNA.csproj » to build it).
Then we will create a world, add a body to it and draw a texture based on the body position.

I encourage you to play with the world properties such as restitution, friction etc to see how it affects your world.
Also, notice how easy it is to detect collision (although I manage only plain shape for now, no convex shapes).

The source code : XNA_DEMO_19

A video to illustrate it.

 Posted by at 13 h 53 min
Nov 232013
 

We have seen in previous article 8 how to perform pixel collision.
Altough it worked perfectly, it only worked on non rotated shapes.

But in some cases, your shape will rotate (like a car in a racing game – see article « A racing car game »).

To perform pixel collision for a rotated shape, here below the steps :

-you first need to draw a rotated rectangle around your shape
-you then need to draw a bounding rectanle around that rotated rectangle (also called AABB : Axis Aligned Bounding Box)
-finally you can check whether 2 AABB intersects, and if so, if in the intersected region, we have 2 non transparent pixels (colliding) or not

The source code : XNA_DEMO_18
Note : the project contains a class named primitives2d which is used only to draw lines/rectangles around my objects.

Lets illustrate this with some screenshots.

Lets rotate our rectangle along with my rocket
pixel2

Lets define our bounding box
pixel3

Despite bounding boxes intersecting, we dont detect collision yet
pixel4

Here we go ! In the intersection region, there are 2 non transparent pixels
pixel5

 Posted by at 17 h 41 min
Nov 052013
 

One article for today : lets build on what have seen so far and lets have a bouncing ball with a background and some sound when the ball hit the walls.

As always we load contents (textures and sound), we update our variables (position and direction), and we finally draw.
By now, you probably got the idea 🙂

The project files : xna_demo_4


Imports Microsoft.Xna.Framework
Imports Microsoft.Xna.Framework.Graphics
Imports Microsoft.Xna.Framework.Audio
Imports Microsoft.Xna.Framework.Content
Imports Microsoft.Xna.Framework.Media
Imports Microsoft.Xna.Framework.Input

Public Class Game
Inherits Microsoft.Xna.Framework.Game
'Fields in our game graphic manager etc'
Dim graphics As GraphicsDeviceManager
Dim spriteBatch As SpriteBatch
'Texture that we will render'
Private mTexture As Texture2D
'Set the coordinates to draw the sprite at'
Private spritePos As Vector2 = Vector2.Zero
'X and Y speed of the sprite'
Private XSpeed As Single = 80
Private YSpeed As Single = 120
'Vector2 used for the speed of the sprite'
Private spriteSpeed As New Vector2(XSpeed, YSpeed)
'sound
Private mysound As SoundEffect
'background
Private backgroundTexture As Texture2D

Public Sub New()
graphics = New GraphicsDeviceManager(Me)
'graphics.ToggleFullScreen()
End Sub

Protected Overrides Sub Initialize()
'TODO: Add your initialization logic here'
MyBase.Initialize()
End Sub

Protected Overrides Sub LoadContent()
' TODO: use this.Content to load your game content here'
MyBase.LoadContent()
' Create a new SpriteBatch, which can be used to draw textures.'
spriteBatch = New SpriteBatch(GraphicsDevice)
'Load the texture'
mTexture = Content.Load(Of Texture2D)("bille")
'load sound
mysound = Content.Load(Of SoundEffect)("sleep")
'load background
backgroundTexture = Content.Load(Of Texture2D)("background2")
End Sub

Protected Overrides Sub UnloadContent()
MyBase.UnloadContent()
'TODO: Unload any non ContentManager content here'
End Sub

Protected Overrides Sub Update(ByVal gameTime As Microsoft.Xna.Framework.GameTime)
'TODO: Add your update logic here'
'The method that will update our sprite position'
UpdateSprite(gameTime)
'
MyBase.Update(gameTime)
End Sub

Protected Overrides Sub Draw(ByVal gameTime As Microsoft.Xna.Framework.GameTime)
'GraphicsDevice.Clear(Color.CornflowerBlue)
'TODO: Add your drawing code here'
Dim mainFrame As New Rectangle(0, 0, GraphicsDevice.Viewport.Width, GraphicsDevice.Viewport.Height)
'Draw the sprite'
spriteBatch.Begin(SpriteSortMode.BackToFront, BlendState.AlphaBlend)
spriteBatch.Draw(backgroundTexture, mainFrame, Color.White)
spriteBatch.Draw(mTexture, spritePos, Color.White)
spriteBatch.End()
'TODO: Add your drawing code here'
MyBase.Draw(gameTime)
End Sub

Private Sub UpdateSprite(ByVal gameTime As GameTime)
'The function move the sprite and check if its on the limits of the screen so it can bounce back'
Dim intMaxX As Integer
Dim intMinX As Integer = 0
Dim intMaxY As Integer
Dim intMinY As Integer = 0
'move the sprite by speed scaled by elapsed time'
spritePos += spriteSpeed * CSng(gameTime.ElapsedGameTime.TotalSeconds)
'Get the max. X and Y coordinates'
intMaxX = graphics.GraphicsDevice.Viewport.Width - mTexture.Width
intMaxY = graphics.GraphicsDevice.Viewport.Height - mTexture.Height
'Check the sprite if its at some of the edges of the screen and then reverce the speed of the sprite'
If spritePos.X > intMaxX Then
'Check if the sprite is at the maximum X coordinates of the screen if so reverse the speed'
spriteSpeed.X *= -1
spritePos.X = intMaxX
mysound.Play()
ElseIf spritePos.X < intMinX Then 'Check if the sprite is at the minimum X coordinates of the scree and reverse the speed' spriteSpeed.X *= -1 spritePos.X = intMinX mysound.Play() End If If spritePos.Y > intMaxY Then
'Check if the sprite is at the maximum Y coordinates of the screen if so reverse the speed'
spriteSpeed.Y *= -1
spritePos.Y = intMaxY
mysound.Play()

ElseIf spritePos.Y < intMinY Then 'Check if the sprite is at the minimum Y coordinates of the scree and reverse the speed' spriteSpeed.Y *= -1 spritePos.Y = intMinY mysound.Play() End If End Sub End Class

 Posted by at 22 h 24 min
Nov 022013
 

In previous articles, we have seen what is needed to code with XNA and also the basics of an XNA class.

Lets now have a look at the small XNA app below : a bouncing ball.

-We declare some global variables
-we load our content (here : a sprite = a bleu ball) in the loadcontent xna method
-we call our updatesprite method in the update xna method which will take care of the moving position
-we draw our sprite in the draw xna method using the update spritepos

Attached to this post is the complete source code and compiled executable : xna_demo_1

Enjoy !


Imports Microsoft.Xna.Framework
Imports Microsoft.Xna.Framework.Graphics
Imports Microsoft.Xna.Framework.Input

Public Class Game
Inherits Microsoft.Xna.Framework.Game
'Fields in our game graphic manager etc'
Dim graphics As GraphicsDeviceManager
Dim spriteBatch As SpriteBatch
'
'Texture that we will render'
Private mTexture As Texture2D
'Set the coordinates to draw the sprite at'
Private spritePos As Vector2 = Vector2.Zero
'X and Y speed of the sprite'
Private XSpeed As Single = 80
Private YSpeed As Single = 120
'Vector2 used for the speed of the sprite'
Private spriteSpeed As New Vector2(XSpeed, YSpeed)

Public Sub New()
graphics = New GraphicsDeviceManager(Me)
End Sub

Protected Overrides Sub Initialize()
MyBase.Initialize()
End Sub

Protected Overrides Sub LoadContent()
MyBase.LoadContent()
' Create a new SpriteBatch, which can be used to draw textures.'
spriteBatch = New SpriteBatch(GraphicsDevice)
'
'Load the texture'
'We are using Stream , not a content (xnb format)
Dim textureStream As System.IO.Stream = New System.IO.StreamReader(Application.StartupPath + "\bille_bleu1.png").BaseStream
'Loading the texture'
mTexture = Texture2D.FromStream(GraphicsDevice, textureStream)
End Sub

Protected Overrides Sub UnloadContent()
MyBase.UnloadContent()
End Sub

Protected Overrides Sub Update(ByVal gameTime As Microsoft.Xna.Framework.GameTime)
'Allows the game to exit'
Dim newState As KeyboardState = Keyboard.GetState
If newState.IsKeyDown(Keys.Q) Then Application.Exit()
'The method that will update our sprite position'
UpdateSprite(gameTime)
MyBase.Update(gameTime)
End Sub

Protected Overrides Sub Draw(ByVal gameTime As Microsoft.Xna.Framework.GameTime)
GraphicsDevice.Clear(Color.CornflowerBlue)
'Draw the sprite'
spriteBatch.Begin(SpriteSortMode.BackToFront, BlendState.AlphaBlend)
spriteBatch.Draw(mTexture, spritePos, Color.White)
spriteBatch.End()
MyBase.Draw(gameTime)
End Sub

Private Sub UpdateSprite(ByVal gameTime As GameTime)
'The function move the sprite and check if its on the limits of the screen so it can bounce back'
Dim intMaxX As Integer
Dim intMinX As Integer = 0
Dim intMaxY As Integer
Dim intMinY As Integer = 0

'move the sprite by speed scaled by elapsed time'
spritePos += spriteSpeed * CSng(gameTime.ElapsedGameTime.TotalSeconds)
'Get the max. X and Y coordinates'
intMaxX = graphics.GraphicsDevice.Viewport.Width - mTexture.Width
intMaxY = graphics.GraphicsDevice.Viewport.Height - mTexture.Height
'Check the sprite if its at some of the edges of the screen and then reverce the speed of the sprite'
If spritePos.X > intMaxX Then
'Check if the sprite is at the maximum X coordinates of the screen if so reverse the speed'
spriteSpeed.X *= -1
spritePos.X = intMaxX

ElseIf spritePos.X < intMinX Then 'Check if the sprite is at the minimum X coordinates of the scree and reverse the speed' spriteSpeed.X *= -1 spritePos.X = intMinX End If If spritePos.Y > intMaxY Then
'Check if the sprite is at the maximum Y coordinates of the screen if so reverse the speed'
spriteSpeed.Y *= -1
spritePos.Y = intMaxY

ElseIf spritePos.Y < intMinY Then 'Check if the sprite is at the minimum Y coordinates of the scree and reverse the speed' spriteSpeed.Y *= -1 spritePos.Y = intMinY End If End Sub End Class

 Posted by at 12 h 53 min