Avr 112014
 

In a previous article, we have seen how to make a bootable image using Windows API and MS Virtual Disk.

Now, lets do the same but this time we will manipulate bytes in the Drive Master Boot Record and in the Volume Boot Sector with CloneDisk and ImDisk.

1-Create a raw disk image (here test.img=64 MB)

clonedisk_mi1


2-Retrieve file size in sectors (here 131072 = (64MB * 1024KB * 1024B) / 512 sectors)

clonedisk_mi2


3-Modify partition table : chs end/start=1023/254/63, sectors before=2048, total sectors=129023 (131072-2048-1)

clonedisk_mi3


4-Write NT6 mbr

clonedisk_mi31


5-Mount disk image (ImDisk auto detect offset=2048, size of disk=129023)

clonedisk_mi32


6-Format to NTFS

clonedisk_mi33


7-Change Hidden Sectors in Boot Sector  (since it is incorrectly set to 1)

clonedisk_mi4

8-Boot (in qemu or virtualbox)


 Posted by at 18 h 56 min
Mar 122014
 

About SystemRescueCD :

Description: SystemRescueCd is a Linux system rescue disk available as a bootable CD-ROM or USB stick for administrating or repairing your system and data after a crash. It aims to provide an easy way to carry out admin tasks on your computer, such as creating and editing the hard disk partitions. It comes with a lot of linux software such as system tools (parted, partimage, fstools, …) and basic tools (editors, midnight commander, network tools). It can be used for both Linux and windows computers, and on desktops as well as servers. This rescue system requires no installation as it can be booted from a CD/DVD drive or USB stick, but it can be installed on the hard disk if you wish. The kernel supports all important file systems (ext2/ext3/ext4, reiserfs, btrfs, xfs, jfs, vfat, ntfs), as well as network filesystems (samba and nfs).

Now as you have understood by now, whenever I can, I skip burning CD/DVD’s and will at worse use a USB stick or at best use PXE Boot.

Lets use TinyPXE Server + iPXE.

First lets prepare our iPXE script (save it to rescue.ipxe)


#!ipxe
set boot-url http://${next-server}
kernel ${boot-url}/sysrcd-4.1.0/isolinux/rescue32 dodhcp netboot=${boot-url}/sysrcd-4.1.0/sysrcd.dat
initrd ${boot-url}/sysrcd-4.1.0/isolinux/initram.igz
boot

Then lets prepare our files

Extrat the content of SystemRescueCD iso to /sysrcd-4.1.0, next to TinyPXE Server.
You can use 7Zip for this operation.

Now, lets setup TinyPXE Server

rescue

Now, lets boot !

 Posted by at 20 h 20 min
Mar 112014
 

There are times where you need to make a bootable disk image, to boot from pxe, or from a boot loader (grub4dos, ms bootmgr, etc).

Lets see how to make it quick and easy with CloneDisk :

1-Lets create and attach a virtual disk
2-Lets create a disk
3-Lets create a partition
4-Lets format it
5-Lets install grub4dos as bootloader
6-Lets copy/paste grldr and menu.lst

1-Lets create and attach a virtual disk
->ignore the parent field
->fill in the path field
->indicate the size (in MB)
->lets go for a fixed one (vs dynamic)

clonedisk_howto1

2-Lets create a disk (i.e initialise)

clonedisk_howto2

3-Lets create a partition
->CloneDisk will use the whole disk size and will make the partition active

clonedisk_howto3

4-Lets format it (FAT or FAT32, NTFS works too)

clonedisk_howto4

5-Lets install grub4dos as bootloader in the MBR

clonedisk_howto5

6-Do not close CloneDisk yet (or else your new virtual logical drive will away) and copy/paste grldr and menu.lst (in CloneDisk zip file)

clonedisk_howto6

You got yourself a bootable disk image, feel free to add your own content.
Even better, since we used a VHD format, you can later on expand this virtual disk.

In a next tutorial, we will see how to PXE boot this virtual disk.

 Posted by at 13 h 46 min
Mar 012014
 

The excellent Rufus software got updated to version 1.4.4.

  • Add uncompressed Disk Image support (FreeBSD, FreeNAS, etc.) (NEW)
  • Add right-to-left language support (NEW)
  • Add an alert when multiple partitions are about to be erased (NEW)
  • Add (unofficial) NTFS Compression support (NEW)
  • Add Finnish translation, courtesy of Riku Brander
  • Ignore failure on ISO autorun.inf creation, to keep dumb security applications happy
  • Improve hotplug detection
  • Improve Syslinux v5+ support (requires an internet connection to download extra files)
  • Fix support for latest gparted, ArchLinux, and other Syslinux v5+ based ISOs
  • Fix detection for Toshiba drives (again)
  • Fix UDF Unicode support
 Posted by at 15 h 49 min
Jan 252014
 

BOOTICE is a powerful boot-related utility.
It’s desired to manipulate (install, backup, restore) the MBR and PBR of disks (or disk images), to partition and format disks, to edit disk sectors in hexadecimal, to erase all the data on your disk or logical drive (by filling with customizable characters), to edit Grub4DOS boot menu, and to edit BCD file of Windows NT 6.x.

2013.12.10 v1.3.2.1
1. Fixed the bug that compacting VHD doesn’t work on Windows 7.

◆ 2013.12.07 v1.3.2
1. VHD/VHDX supporting. Now you can create, mount or unmount, resize, compact, reset the parent VHD file for VHD/VHDX files.
2. Better partition formatting speed, especially for NTFS.
3. Allow formatting as FAT32 on a partition larger than 32GB.
4. Fixed a bug that cuases wrong total sectors of VHD files.
5. When installing GRUB4DOS/WEE MBR, the choice « Install NT6 MBR to the 2nd sector » was checked initially.

Find it here.

bootice

Jan 132014


  • fixed: remoteport=4011 when srcport=4011 -> was preventing some ipxe client to boot (uefi for exemple)
  • changed: opt60=empty by default when using opt67 (was ‘PXEClient’ before) -> was preventing ipxe client to boot with opt67
  • changed: opt60=’PXEClient’ when proxydhcp=1 (was hardcoded before) -> more flexible
  • fixed: xid is now displayed correctly -> was reversed order
  • fixed: was sending an empty boot filename in proxydhcp in the dhcp_offer stage -> removed, was preventing proxydhcp+opt67
  • changed: bind=true by default when multiple interfaces detected -> was preventing pxe boot with multiple interfaces when bind=false

Discuss it here.

 Posted by at 23 h 26 min
Jan 122014
 

Here below some drafts notes on how to boot WINPE on a UEFI computers.

1/Files you need from your windows x64 dvd

-\efi\boot\bootx64.efi file (1)
-\efi\boot\bcd file (2)
-\efi\boot\boot.sdi file (3)
-\efi\microsoft\boot\fonts folder (4)
-\sources\boot.wim (5)

If you dont find bootx64.efi, you can use bootmgfw.efi which is in install.wim on your dvd (sources folder).
Use 7zip to extract this file from the wim file and rename it to bootx64.efi

2/Files you need in your tftp root

-get in your tftp root
put bootx64.efi (from 1)
-create a SOURCES folder
put boot.wim in there (from 5)
-create a BOOT folder
put boot.sdi in there (from 3)
put bcd in there (from 2) / applies for Win8
-create a EFI/MICROSOFT/BOOT folder
put bcd in there (from 2) / applies for Win7
put the FONT folder in there (from 4)

You should end up with the following :
=>ROOT
-bootx64.efi
==>SOURCES
==boot.wim
==>BOOT
==boot.sdi
==bcd (for win8)
==>EFI/MICROSOFT/BOOT
==bcd (for win7)
===>FONTS
===*.ttf

3/Things you need to do on your boot.wim

Add the following winpeshl.ini (create it with notepad) file in your boot.wim (system32), making it a « cheap » winpe.

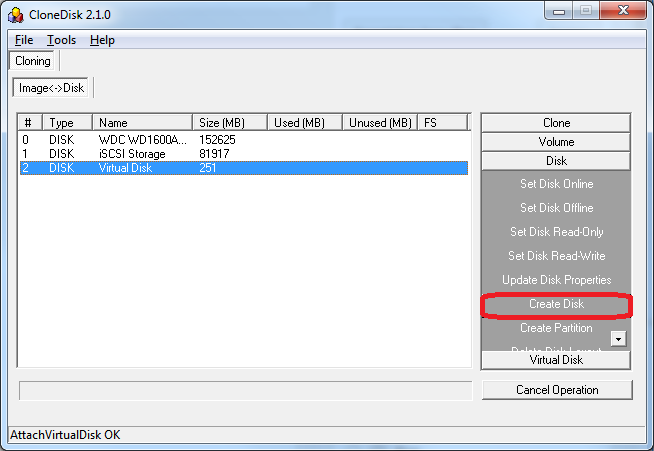
To modify your boot.wim, you can either mount/change/commit it with DISM (from the command line), or with CloneDisk or else modify it with wimlib :
wimlib-imagex update boot.wim 1 --command="add CustomWinpeshl.ini \Windows\System32\winpeshl.ini"


[LaunchApps]
%SYSTEMDRIVE%\Windows\system32\startnet.cmd
%SYSTEMDRIVE%\windows\system32\cmd.exe

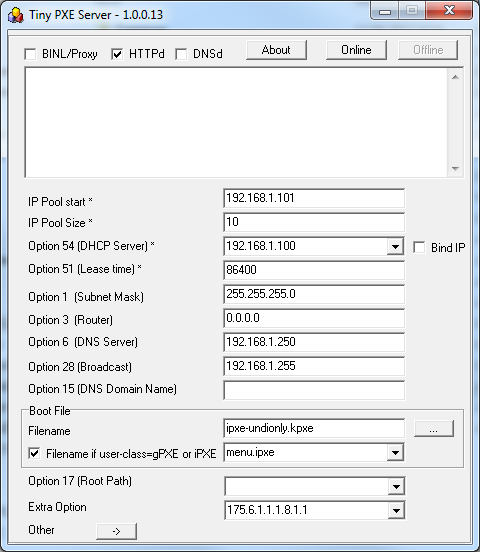
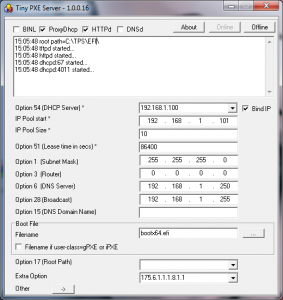
4/Things you need to do in your PXE Server :

Set bootx64.efi as the bootp filename.

The UEFI + PXE boot process will be the following :
pxe->bootx64.efi (from windows install dvd)->bcd (pointing to winload.efi)->boot.wim (x64 only)

as opposed to a legacy bios computer :
pxe->pxeboot.n12 (from windows install dvd)-> bootmgr.exe -> bcd (pointing to winload.exe) -> boot.wim

Site note : you can use option dhcp 252 to decide which BCD file to load.
Can be handy when you want to switch from a UEFI computer to a legacy BIOS computer : efi\microsoft\boot or boot\bcd

tps_howto_uefi

side note : you can check if you booted on uefi with the following reg query HKLM\System\CurrentControlSet\Control /v PEFirmwareType Will output 0x1 for bios, 0x2 for uefi.

Cheers,
Erwan

Note that the following would aso work : PXE-> IPXE.efi ->MS Bootx64.efi ->BCD (winload.efi) ->Boot.wim (x64).

Ipxe script

#!ipxe
#change with you dhcp or proxydhcp server
set next-server 192.168.1.11
set filename boot/x64/bootmgfw.efi
chain tftp://${next-server}/${filename}

And changes to apply to your BCD : bcdedit.exe /store my.bcd /set {bootmgr} nointegritychecks yes

 Posted by at 21 h 49 min  Tagged with:
Jan 112014
 

There are times where you may not have a dvd drive or media available, or else, you may also want to perform some tasks before triggering the windows setup.

Agenda

  • Prepare winpe with QuickPE
  • Prepare the ipxe script
  • Prepare the PXE server with TinyPxe Server
  • Boot to winpe and Install windows
  • Reboot and complete the installation on the local drive

Prepare winpe with QuickPE

You can either use MS WAIK (winpe3), or MS ADK (winpe4) or an existing windows setup DVD or ISO file.
Launch _run_me.cmd and make your choice.

quickpe_menu

Prepare the ipxe script

The following will attach an iscsi drive and will boot your winpe


#!ipxe
dhcp net0
set boot-url http://${dhcp-server}
initrd ${boot-url}/images/winpe4.iso
kernel ${boot-url}/memdisk iso raw
boot

Prepare the PXE server with TinyPxe Server

Use ipxe-undionly.kpxe as « boot file name » and the above script (name it install.ipxe) as « filename if user-class=iPXE »

tinypxeserver

Boot to Winpe

Now lets network boot (pxe as first device in the bios).
Computer will pxe boot, load ipxe, then load your script.
The script will boot into winpe.

Now we are ready to perform the installation : map a drive thanks to PeNetwork (in the tinyshell launchbar) and map a network share containing your windows installation files.
You could eventually script this part (in batch file) :

net use \\servername\sharename /user:username password
\\servername\sharename\setup.exe

Note1 : CloneDisk can also mount a virtual dvd drive from an iso file (only in winpe4).

Note2 : Rather than launching the setup.exe from the windows DVD, you can also apply a wim file to the target drive using imagex (or clonedisk).
If so, then remember that you need to prepare the drive (partition active, boot sector …).
Example code using imagex (we’ll assume the partition has been made active already) :

Imagex /apply \\servername\sharename\install.wim 1 c:
bcdboot c:\windows /s c:
bootsect /nt60 c: /mbr

Launch the windows setup and let it run.

Reboot to local drive

Windows should the complete the installation, and reboot one last to your windows desktop.

See below a video demonstrating the above steps.

 Posted by at 14 h 51 min
Nov 172013
 

A new version is out (nov 12).

As always, many bug fixes and new features, such as a new BCD editor.

A must have.

Find it here.

 Posted by at 20 h 45 min
Oct 162013
 

Here below a step by step to PXE boot Linux Mint over NFS

needed :
ipxe
tiny pxe server
winnfsd
Mint

1/Prepare the Linux Mint files

open mint.iso in winrar (or any other iso reading capable tool).
extract casper folder to x:\pxe\iso\mint (or any path that suit you)

2/Prepare NFS Server

launch winnfsd with the following :
winnfsd.exe -id 0 0 x:\pxe\iso\mint

note : adapt the above path with your own path

3/Prepare iPXE Script

#!ipxe
set nfs-server ${next-server}
kernel /ISO/mint/casper/vmlinuz root=/dev/nfs boot=casper netboot=nfs nfsroot=${nfs-server}:/x/ISO/mint quiet splash
initrd /ISO/mint/casper/initrd.lz
boot

note : adapt /x/pxe/ISO/mint to your own path.
name it mint.ipxe and put it in x:\pxe

4/Prepare PXE Server

put ipxe-undionly.kpxe in x:\pxe
launch tiny pxe server with the following settings (leave other settings untouched) :
->boot filename = ipxe-undionly.kpxe (use the browse files and folders « … » button)
->filename if user-class=iPXE = mint.ipxe

push the online button

5/Boot !

pxe boot your computer and here we go 🙂

linux-mint-10-lxde

 Posted by at 19 h 25 min