I discussed WinFE some weeks ago here.
It got updated with the following significant features (amongst others) : SysWOW64 and UEFI support. See here.
Here below a video illustrating the previous article.
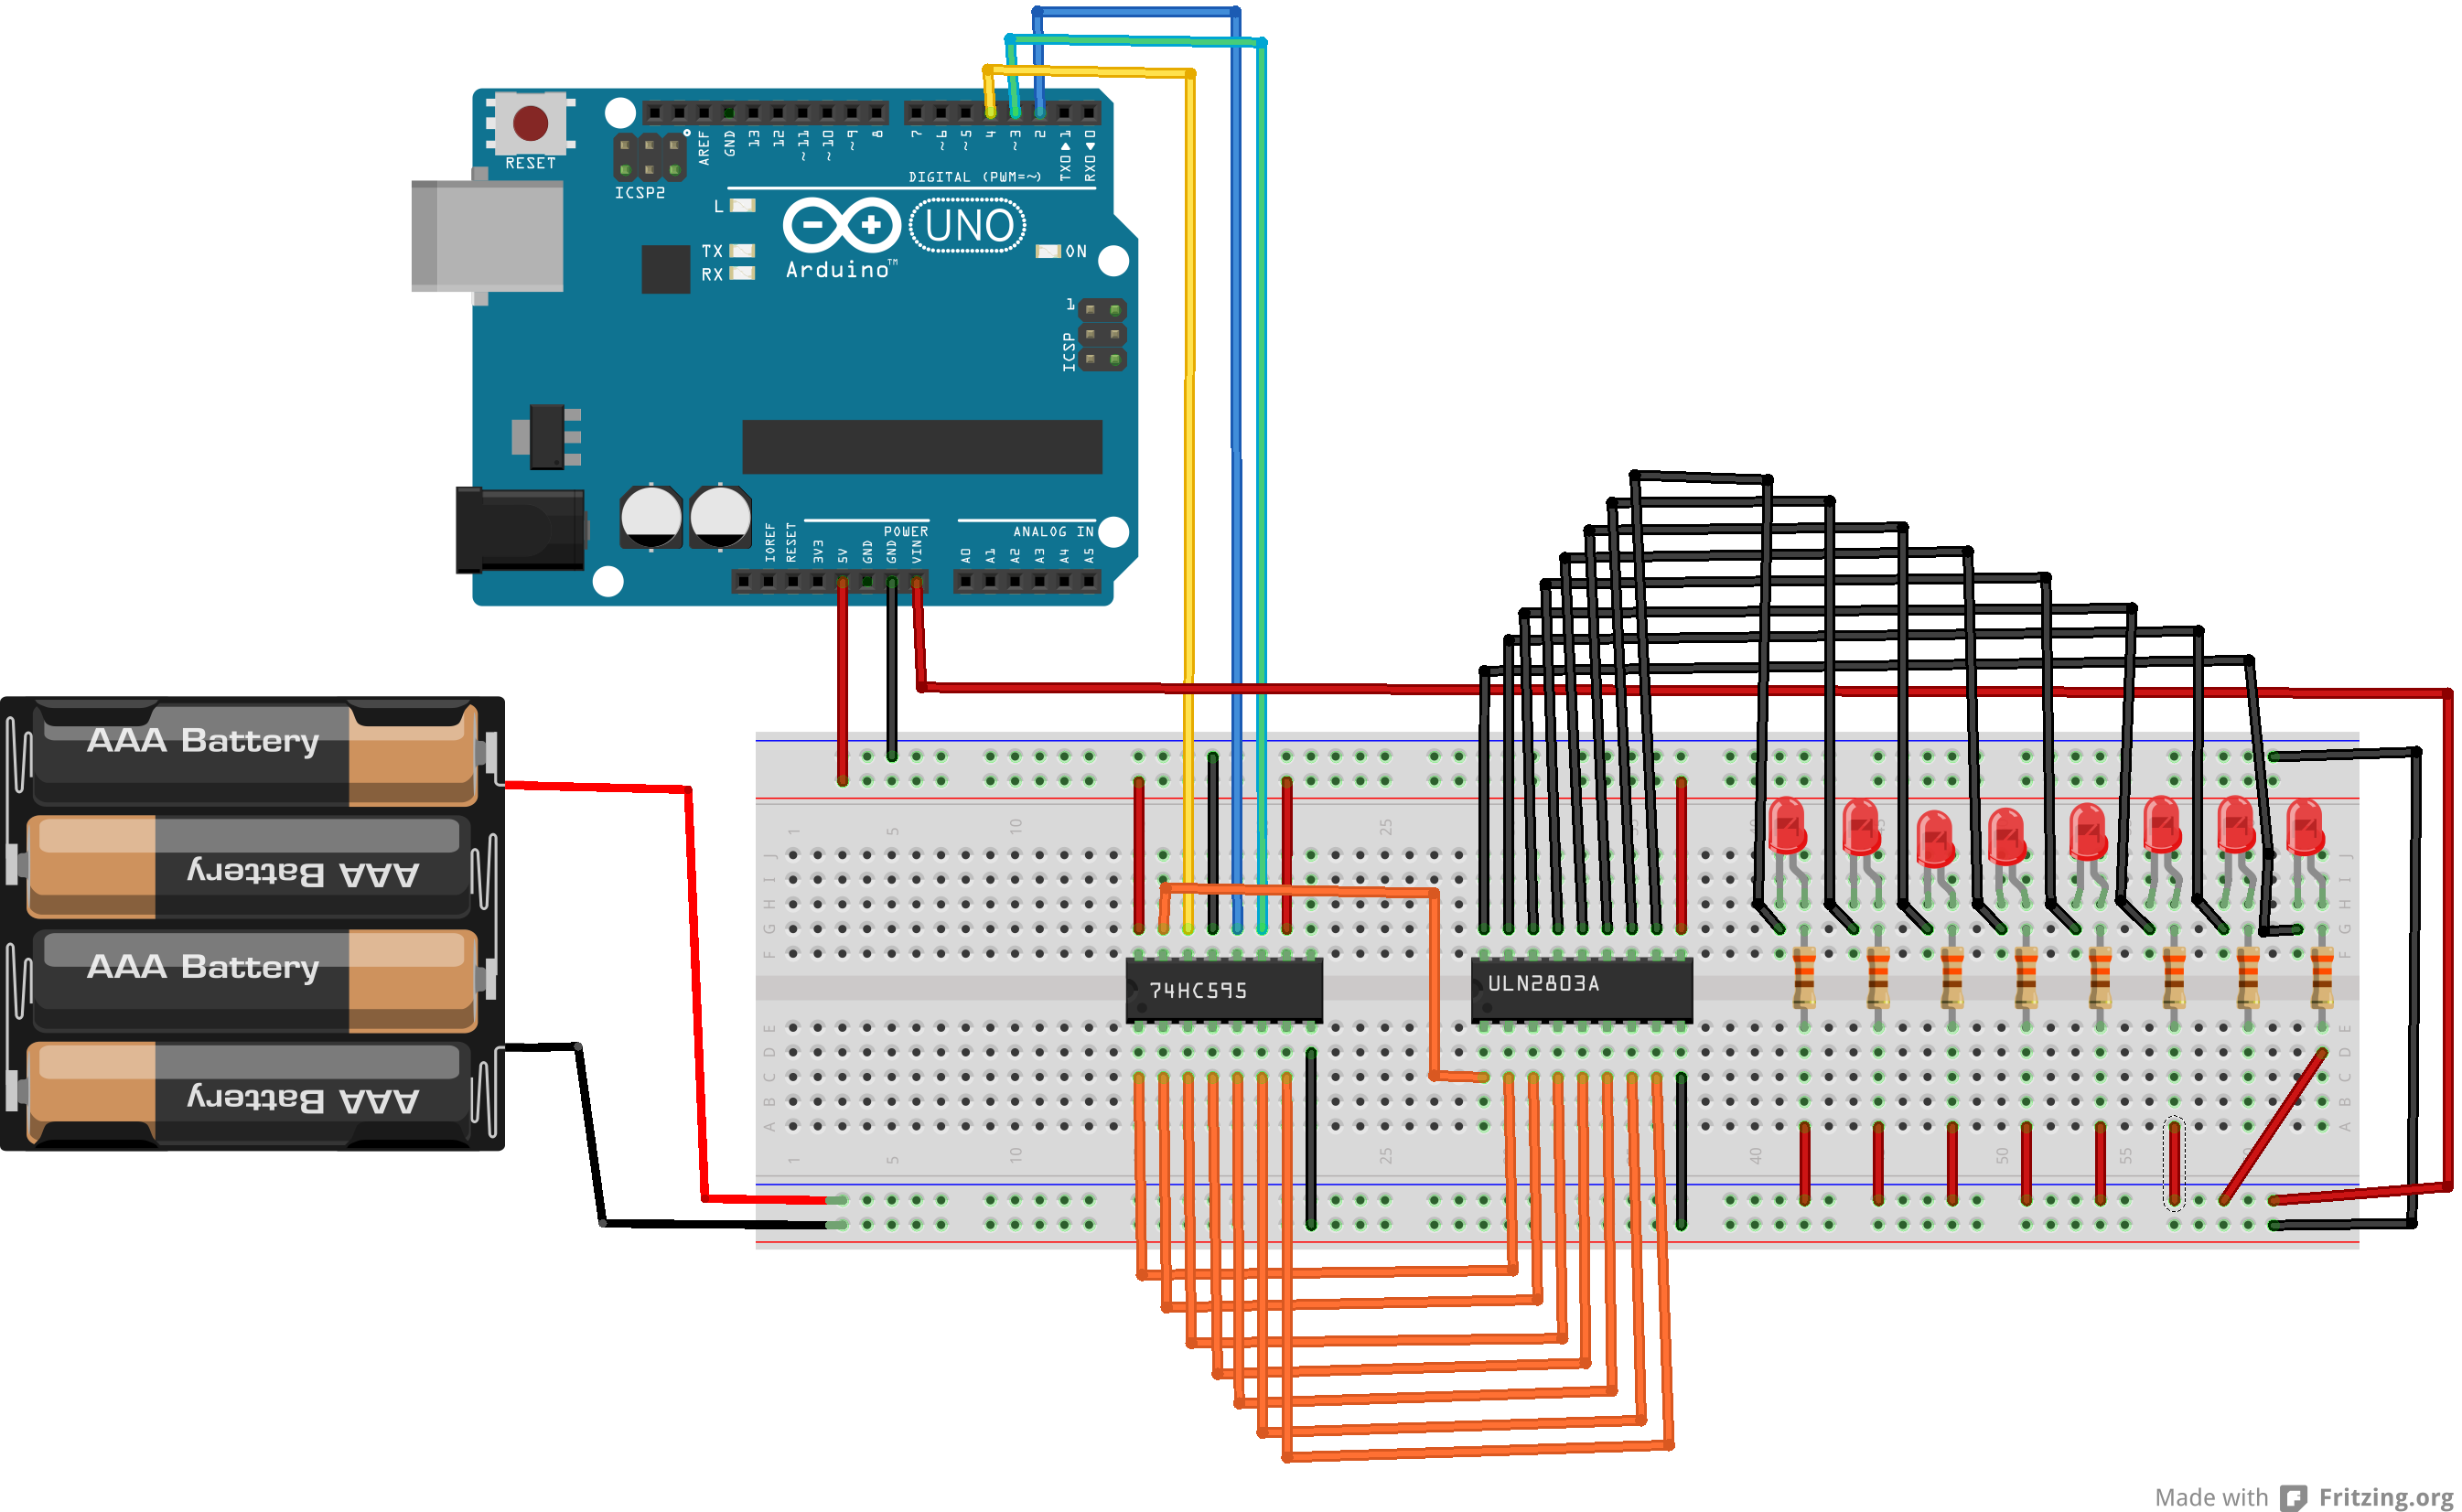
On the proto board, you’ll notice a 74HC595 controlling a ULN2803 plugged to 8 leds.
I use the below array of byte to have the up and down effect
  dataArray[0] = 0xFF; //11111111
  dataArray[1] = 0xFE; //11111110
  dataArray[2] = 0xFC; //11111100
  dataArray[3] = 0xF8; //11111000
  dataArray[4] = 0xF0; //11110000
  dataArray[5] = 0xE0; //11100000
  dataArray[6] = 0xC0; //11000000
  dataArray[7] = 0x80; //10000000
  dataArray[8] = 0x00; //00000000
Still on my journey to a wordclock…
In the previous article, we have seen how to use a shift register to control up to 8 digital outputs (or more if you cascade IC’s).
One drawback in the previous setup is that we had to use one transistor per digital output (to control a device powered by another source).
That is 8 extra transistors, 8*3 extra wires, etc : not very practical and especially if we intend to control several shift registers IC’s. (i plan on using 3 in my wordclock project)
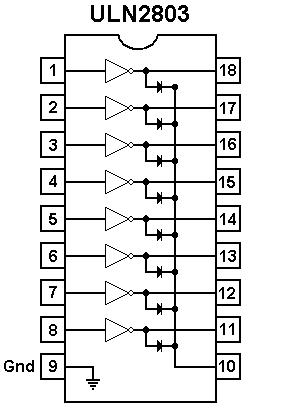
So this is where the ULN2803 comes in : 8 NPN transistors and one common ground in one integrated circuit.
See below a refreshed schema (compared to the previous article). Note that I have decided to power my IC’s with my (regulated) Arduino 5v but I could as well have used my battery pack power.
Our 74HC595 will control our ULN2803 (by sending HIGH or LOW on the input) which in turn will drive the current thru each output/led.
the Arduino sketch :
//the pins we are using
int latchPin = 2;
int clockPin = 3;
int dataPin = 4;

void setup() {
  //set all the pins used to talk to the chip
  //as output pins so we can write to them
  pinMode(latchPin, OUTPUT);
  pinMode(clockPin, OUTPUT);
  pinMode(dataPin, OUTPUT);
}

void loop() {
  for (int i = 0; i < 8; i++) {

    //take the latchPin low so the LEDs don't change while we are writing data
    digitalWrite(latchPin, LOW);

    //shift out the bits
    shiftOut(dataPin, clockPin, MSBFIRST, i);

    //take the latch pin high so the pins reflect
    //the data we have sent
    digitalWrite(latchPin, HIGH);

    // pause before next value:
    delay(1000);
  }
}
I have a wordclock project.
Before I get there, I need to learn about transistors (see previous article) to handle an external power source for my leds and a shift register to control lots of leds with an Arduino.
Why am I not using the digital pins?
For 2 reasons :
-the digital pins are there to input/output a logic (0/1), not power
-my arduino only has 14 digital pins (I need about 25 output)
So to sum it up, we will use
-an external power source to power on our leds,
-transistors to isolate the external power source from the arduino,
-a shift register (74HC595) to handle 8 outputs at once with only 3 pins.
See below a wiring to use shift registers on two leds (it would be more impressive/significant with 8 leds with I was too lazy to draw it all).
Notice that we also use our external power source to power on the Arduino thru the vin pin.
About transistors, next evolution is to replace the serie of transistors by a transistor array like a uln2803a.

And now the arduino sketch.
note : all led on =b11111111 (255), 7 led on =b0111111, 6 led on=b00111111, etc …
//the pins we are using
int latchPin = 2;
int clockPin = 3;
int dataPin = 4;

void setup() {
  //set all the pins used to talk to the chip
  //as output pins so we can write to them
  pinMode(latchPin, OUTPUT);
  pinMode(clockPin, OUTPUT);
  pinMode(dataPin, OUTPUT);
}

void loop() {
  for (int i = 0; i < 8; i++) {

    //take the latchPin low so the LEDs don't change while we are writing data
    digitalWrite(latchPin, LOW);

    //shift out the bits
    shiftOut(dataPin, clockPin, MSBFIRST, i);

    //take the latch pin high so the pins reflect
    //the data we have sent
    digitalWrite(latchPin, HIGH);

    // pause before next value:
    delay(1000);
  }
}
A common mistake with Arduino beginners is to use the board to deliver power .
Altough it is ok for small devices such as sensors, leds, etc, it can only deliver 40ma (per pins) which wont work for more needy devices such as motors.
There comes the transistor which lets a small current control a much larger one and your Arduino can therefore manage devices which are power supplied from a separate source.
There are 2 sort of transistors : the PNP and the NPN.
The PNP will turn on with a LOW signal whereas the NPN will turn with a HIGH signal.
A transistor has 3 pins (looking at the labelled / flat side), from left to right : (C) the collector, (B) the base, (E) the emitter.
The collector is connected to the negative pin of the device. (the positive pin of the device being connected to the positive power supply)
The base is connected to the digital pin of the arduino.
The emitter is connected to the ground.

See below the wiring

The the Arduino sketch is rather simple
int Pin = 9;

void setup(){
pinMode(Pin, OUTPUT);
}

void loop(){
digitalWrite(Pin, HIGH);
delay(2000);
digitalWrite(Pin, LOW);
delay(2000);

}
You built this perfect VHD and you decide to call it parent.
Now life needs to go on and changes need to be introduced to your disk but you want to be able to revert back to your parent if needed.
Or else, at some point you decide that changes introduced since your last parent needs to be merged in your master.
In order to achieve the above (revert or merge) we will create a second VHD called child.
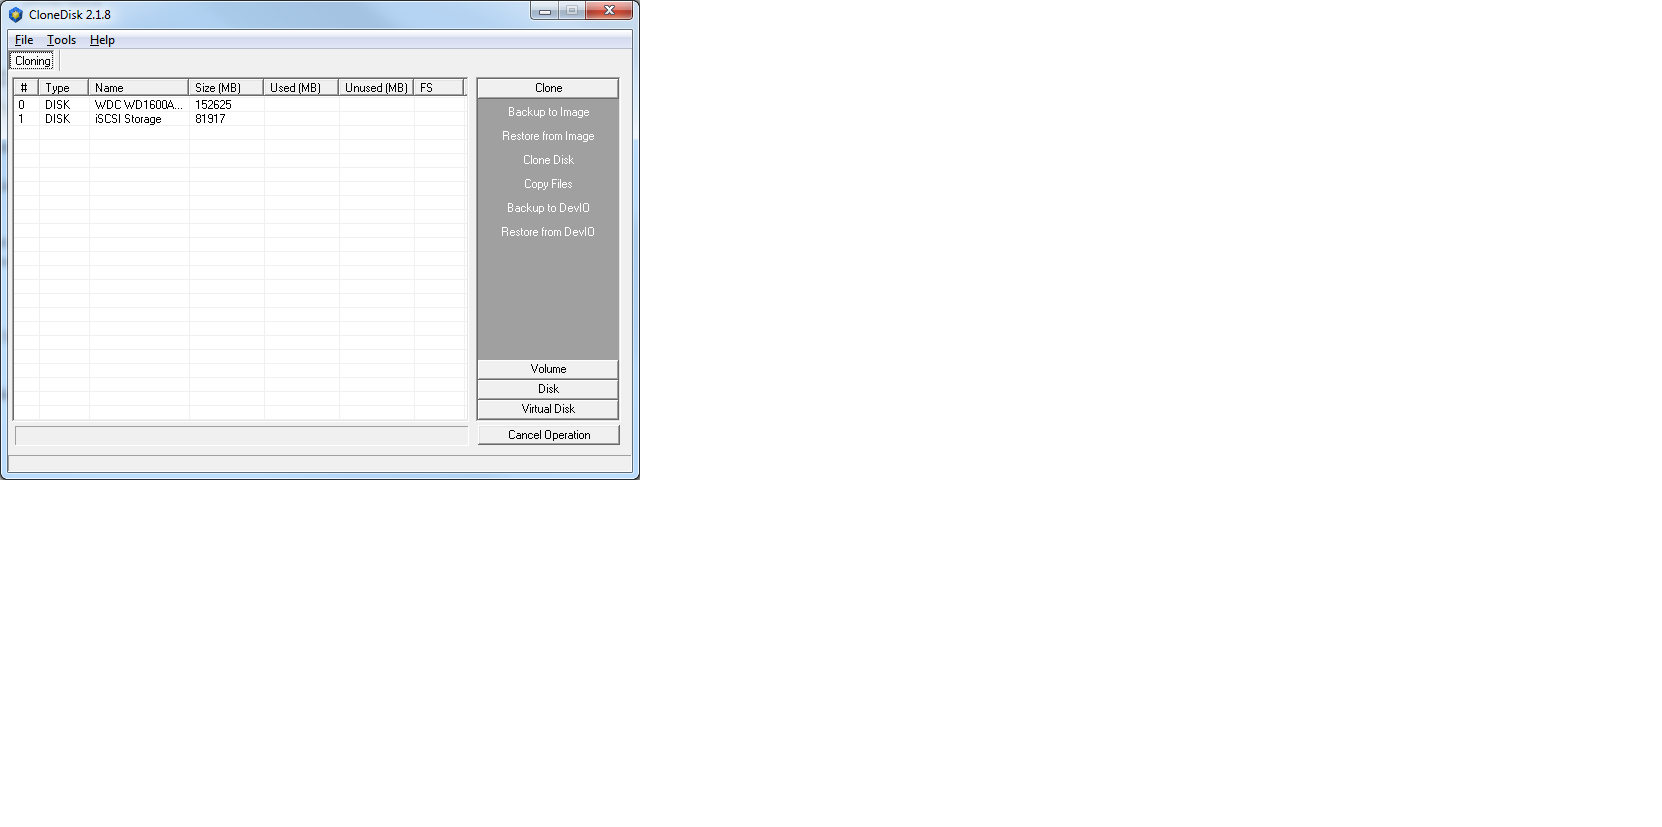
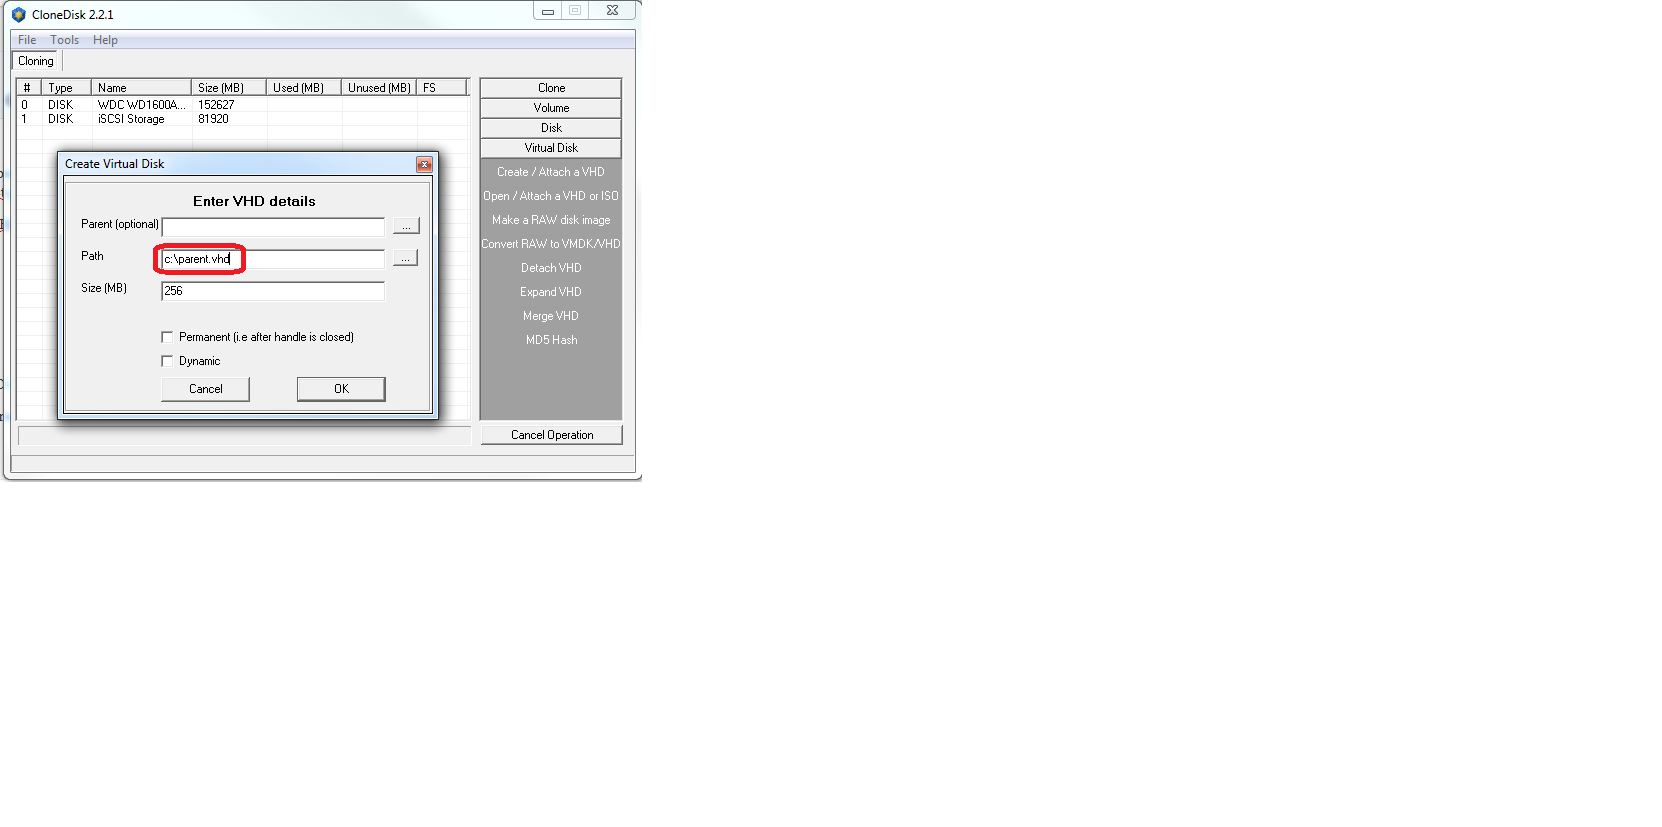
Lets see how to do it with CloneDisk (5 actions/steps)
1-Create/attach our parent
2-Create a file named parent.txt on the new logical drive
3-Detach it
At this point you should no longer introduce changes in your parent VHD until you decide to revert or merge
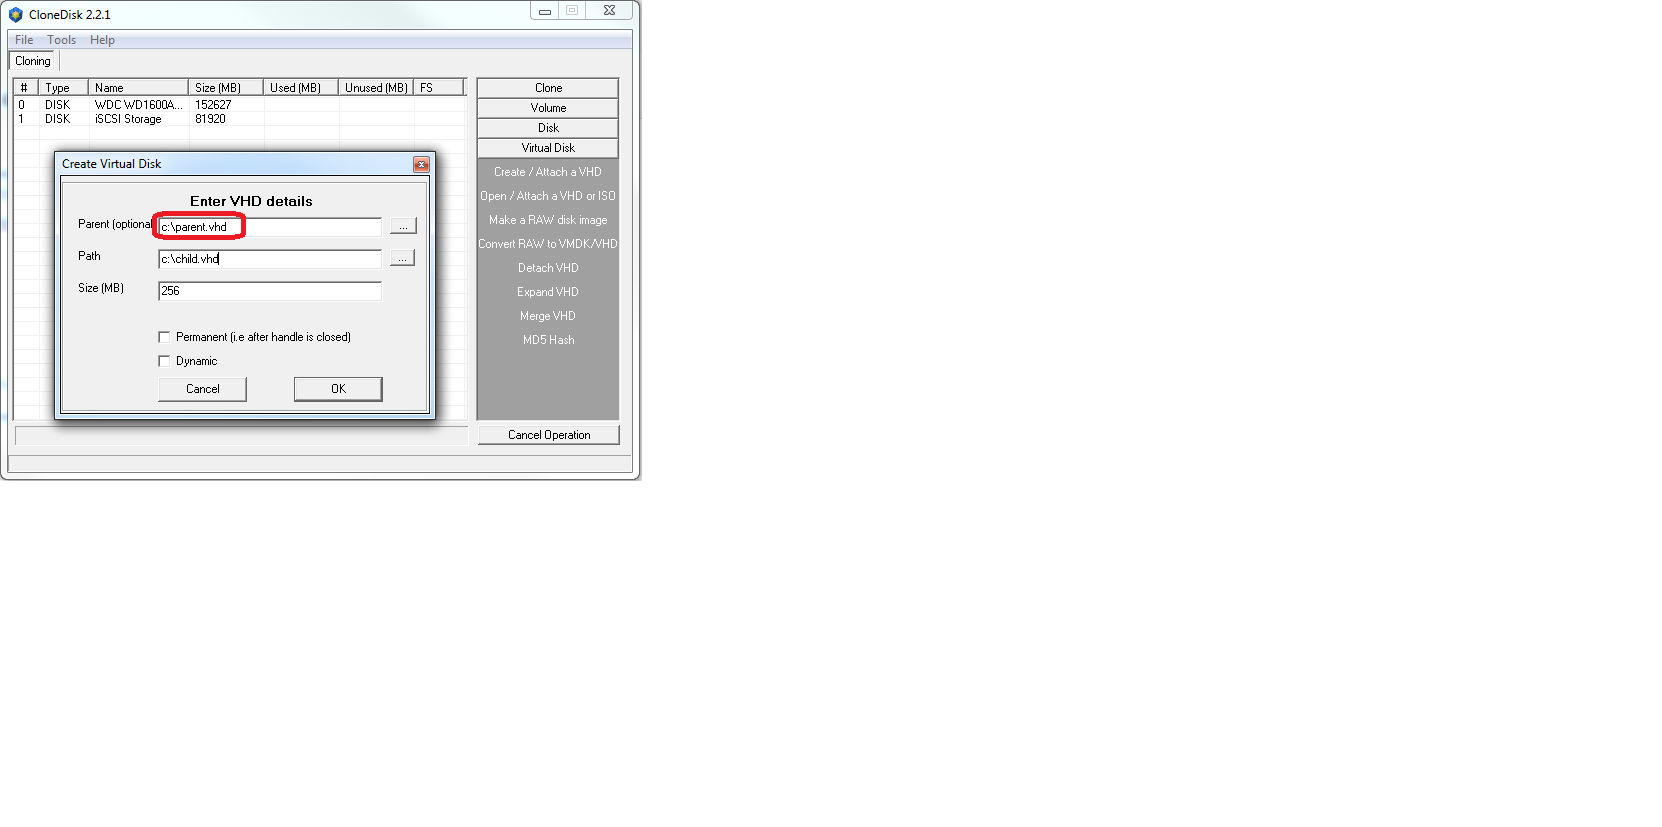
4-Create/attach our child but this time we will indicate which one is a parent (created in step 1)
You will get again a new logical drive and parent.txt will already be here.
5-Create a file named child.txt
That change will « only » be applied in child.vhd, not parent.vhd.
Now you can either merge it or revert it (i.e delete it) whenever you feel like it.
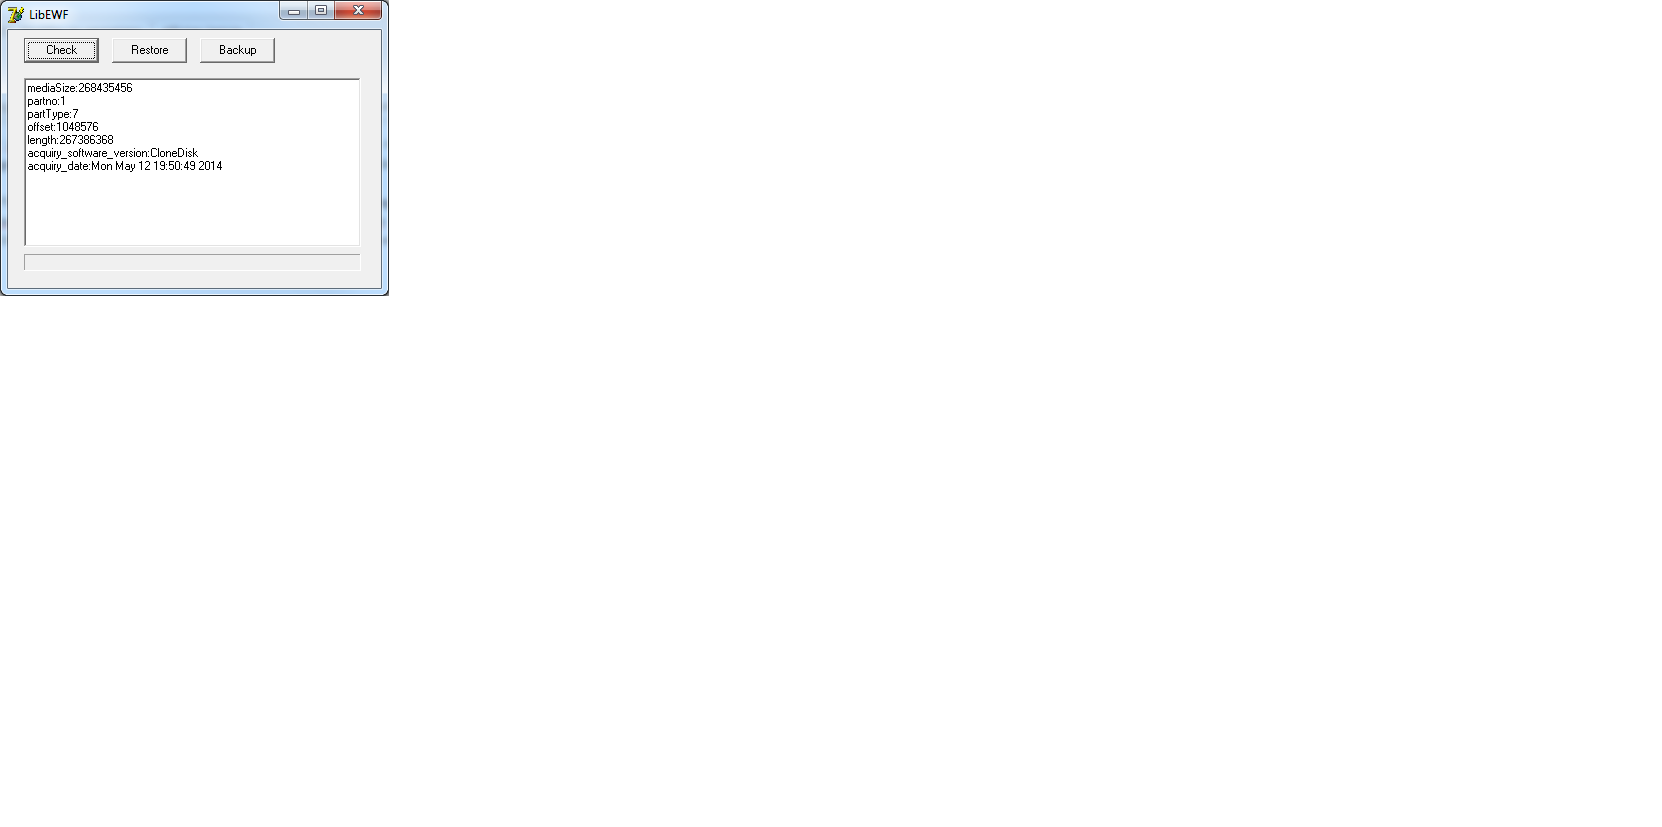
Libewf is a library to access the Expert Witness Compression Format (EWF). Read more here.
Also, read more about the Encase image file format here.
Lately I took interest into the EWF file format for my CloneDisk software.
I found a delphi unit implementing read only access to EWF files but it was (out)dated from 2010 using deprecated funtions.
I therefore decided to refresh (rewrite) it so that it uses the latest functions from the version 2 library and I also implemented a couple of extra functions like write, set header, set compression, etc.
EWF support for CloneDisk has the following benefits for now :
-the compression (at the expense of speed thus)
-it can be mounted later on
-it can be browsed later on
Later on, I could see other benefits :
-headers / metadatas such as author, os name, os build, description, etc
-md5/sha1
-multi threading (to get more speed)
…
Found the delphi project (sourcecode v1) here libewf.
Updated version (v2 / will work with delphi xe5 and 32/64 bits) : libewf.
PartedMagic is a disk management solution.
It does disk partitioning, disk cloning, data rescue, disk erasing, benchmarking.
Note, since August 2013, the tool has required a fee to download.
Lets now see how to PXE boot this linux distribution.
For this we will use TinyPXE Server and IPXE.
First lets prepare our iPXE script (save it to rescue.ipxe)
#!ipxe

set boot-url http://${next-server}

kernel ${boot-url}/memdisk iso

initrd ${boot-url}/images/pmagic/pmagic_2013_02_28.iso

boot
Now, lets setup TinyPXE Server
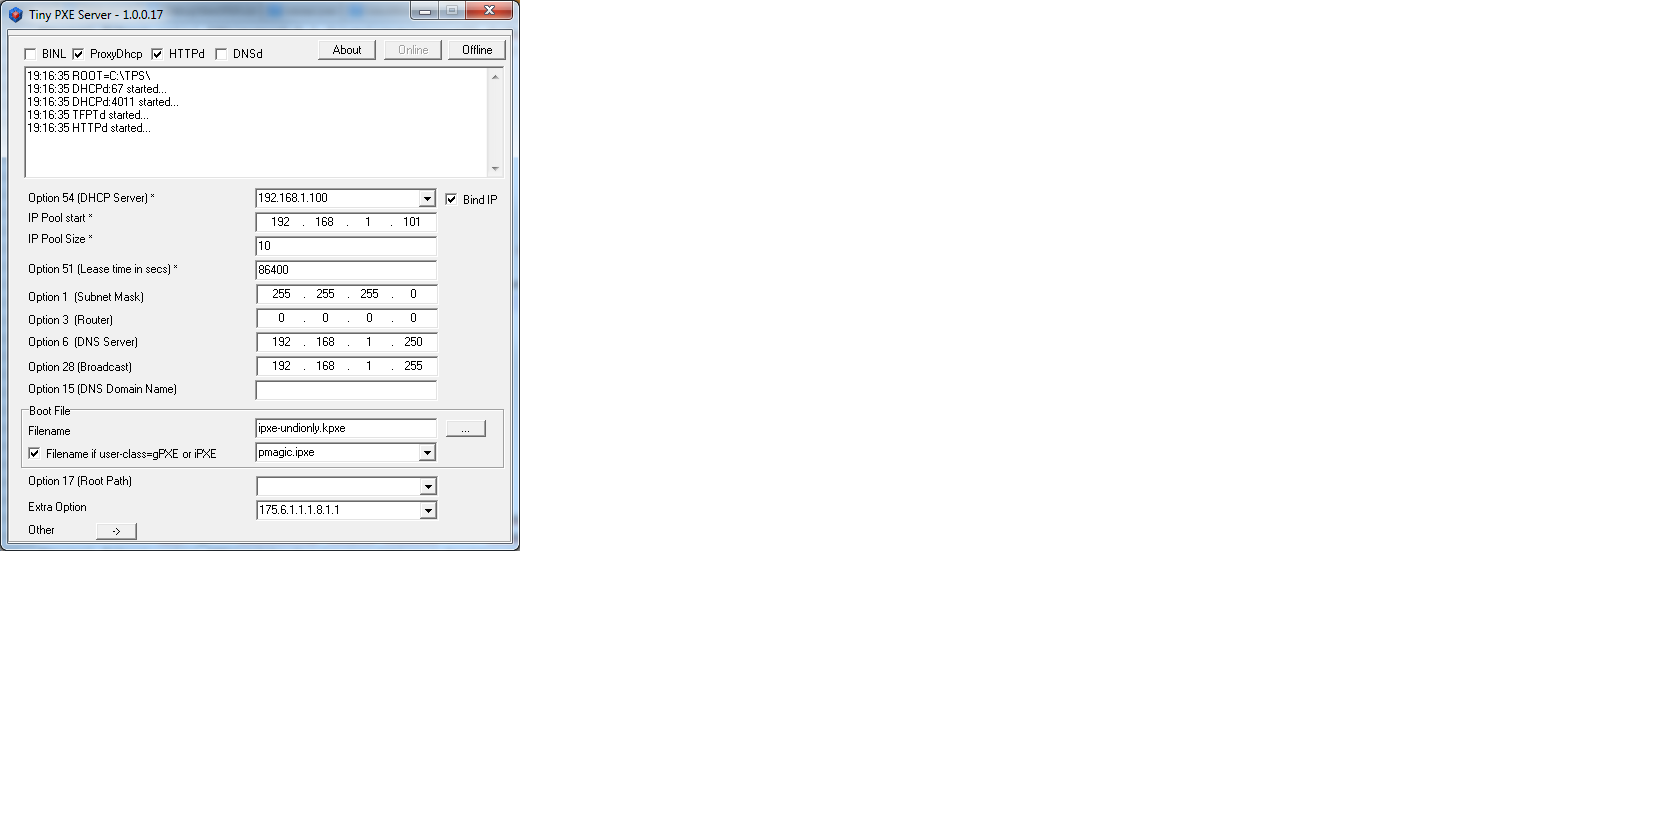
Now, lets boot !
Note :
-My iso is from february 2013, I cannot tell for sure it earlier or newer ISO’s will boot thru PXE
-This method (using memdisk) requires at least twice the size of the iso (lets round it up to 1 gb). if this is an issue, you may want to revert to booting pmagic filesquash.
Changes since last changelog :
Discuss it here. Download it here.
added : change diskid in partition editor
changed : increased buffersize from 64k to 512k to speed backuping process
changed : will write win8.1u1 mbr and bs (compatible with all previous windows NT)
added : md5 hash for file
added : hide_advanced boolean param in config.ini (options section)
added : screenshot
added : can remove an outlookbar button or page via the config.ini (outlookbar section)
added : can inject any MBR boot code
modified : changed all desktopcenter to screencenter
added : patch bytespersec / sectorsperclus / secreserved in boot sector
changed : bootsector patches for MSDOS5.0 (fat/fat32) as well (was only for oemid=NTFS)
changed : renamed offlinereg unit to uofflinereg
changed : changed window size to 640*480
changed : pagecontrol3 for more space in main screen
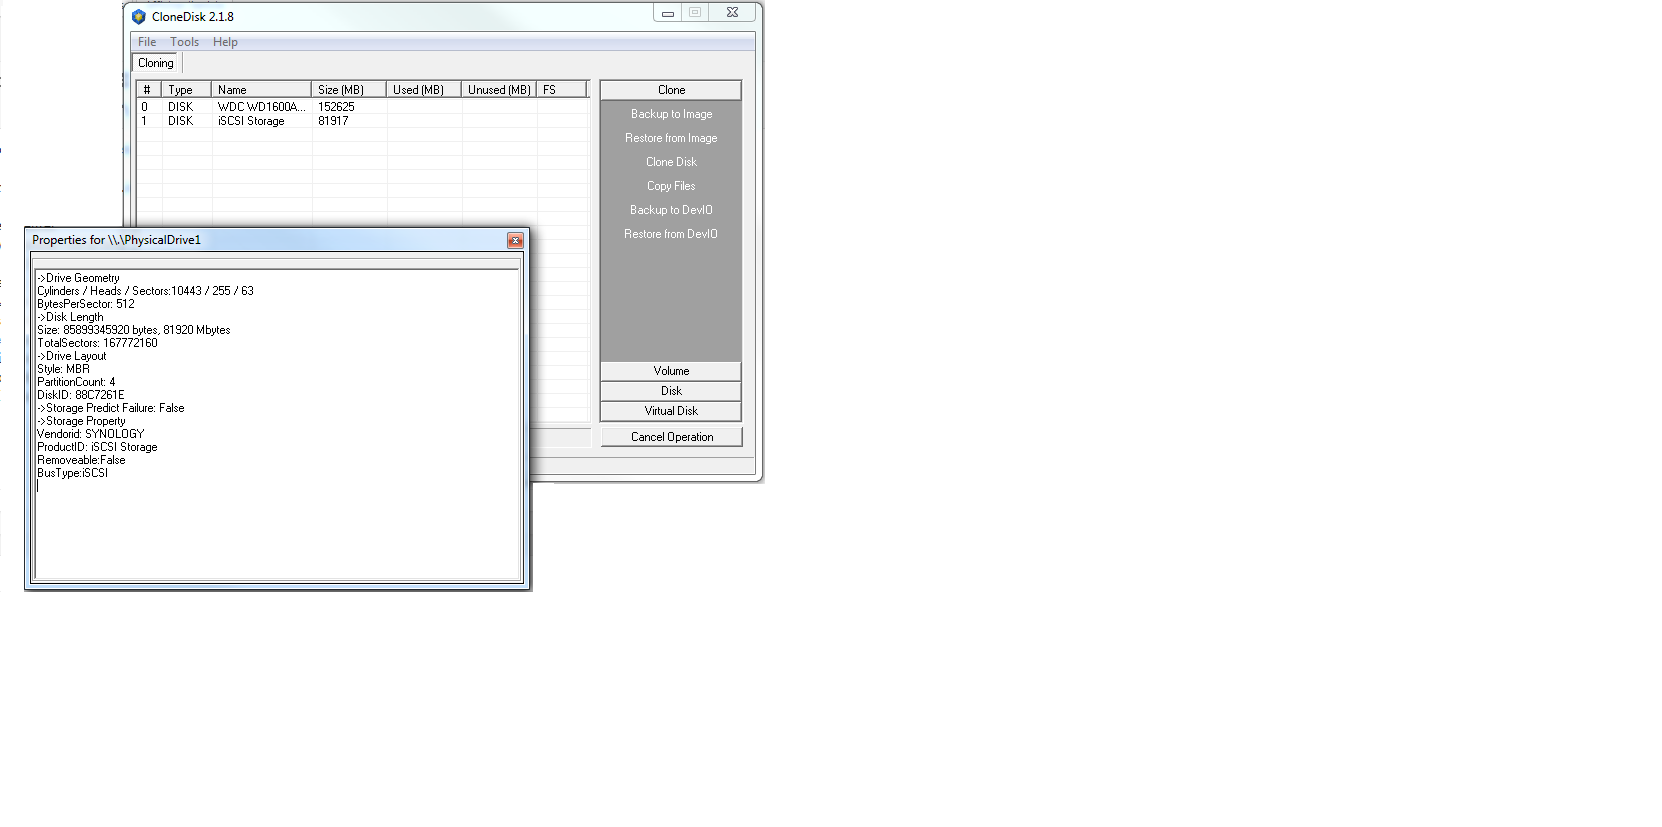
changed : disk/partition properties rewiewed (no access to mbr/bs anymore, all windows api)
added : disk/part properties in a separate window
changed : tabsheet4 removed (disk/part properties)
added : double click on the main listview will also display the disk/part properties window
changed : tabsheet8 removed
added : change diskid in mbr tab